What is Regression Testing? A Practical Guide
Learn what regression testing is, its types, and the step-by-step process to catch bugs early during code changes.


What is regression testing?
Regression testing ensures that previously developed features or actions perform as expected after developers made changes to the code.
The “changes in code” here may be bug fixes, new feature updates or even updates in UI elements that may have unintended side effects.
Basically, regression testing is what you do to catch unintended consequences (in how a website or software app works) for the end users.
For example...
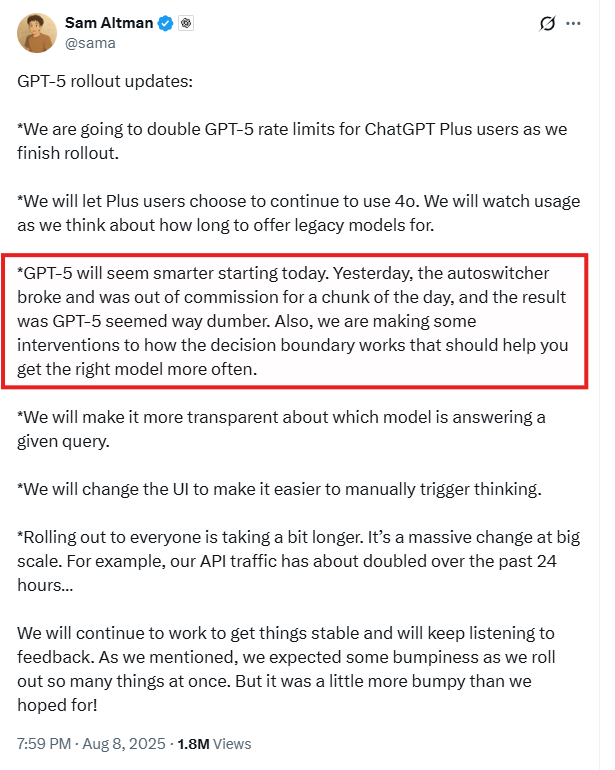
Open AI released GPT-5 on August 7, and users say it’s slower (even without the thinking mode), gets basic questions wrong, and doesn’t follow instructions.
An X user even shared a math error, among many other instances where GPT-5 was wrong:

To these, Sam Altman says their “autoswitcher (to change models) broke and was out of commission for a chunk of the day,” which made the model dumber:
This example shows what can happen when regression testing wasn’t done (on parts of your website that may be affected by new changes) before it’s released to end users.
Regression testing vs. new feature testing vs. retesting
Regression testing is called many things, including what it’s not. Retesting is “fix verification” while regression testing is “holistic sanity check” to know if what is added doesn’t break something else.
Here’s a clear overview of these different terms:
Types of regression testing (and when to use them)
There are six types of regression testing with different use cases based on scope, scale and change impact:
1. Unit regression testing
Unit regression testing focuses on small, isolated code changes that affect only one function or activity.
This process tests individual components or modules impacted by the change in your codebase to isolate a specific functionality and verify that it still works correctly.
For example, if a developer updates the discount calculation function without altering the checkout logic, they only need to verify that the discount feature operates as expected.
This helps devs catch micro-regressions early to prevent escalation to larger problems.
2. Partial regression testing
Partial regression testing focuses on specific areas affected, not the whole app or website. It tests the modified module and dependent areas.
For example, a developer modifies cart logic and tests only the cart and checkout modules. Afterall, only these existing features may have regressed due to the change in cart logic.
3. Selective regression testing
Selective regression testing targets a subset of pre-selected tests based on the most affected areas. This targets areas that get the most user traffic or have a history of breaking.
For context, after an API update, a dev may test login, checkout and the search bar of an ecommerce website because these are business-critical flows that must not regress in functionality.
4. Complete regression testing
This is the time-consuming process where you test and optimize the entire website or software app.
It’s usually done before rolling out a major update across your website (or all brands in a portfolio) to ascertain everything works as it should.
5. Progressive regression testing
This is when you test a new feature and existing functionality simultaneously to make sure a new code doesn’t affect the system.
For context, you’re writing new test cases for a subscription feature during the same sprint it’s built. This integrates quality assurance into software development (instead of treating it in the final phase) to avoid “test debt.”
6. Visual regression testing
This helps developers catch unexpected UI/UX changes after updates in style or layout. For example, you ensure the homepage banner still displays correctly after a CSS overhaul.
So, when should you perform regression testing?
A rule of thumb is to start and complete regression testing anytime something changes. This may be:
- After bug fixes (because fixing one issue can unintentionally trigger another).
- Before releases (because the new rollouts may affect previous functionality, just as I cited in the GPT-5 scenario).
- After a new feature rollout (self-explanatory).
- Automated in CI/CD pipelines. Continuous integration/deployment means changes flow into production fast (sometimes multiple times a day). But with automated regression in CI/CD pipelines, you’ll catch breakages before code merges or deploys to protect uptime and reduce emergency rollbacks that may affect your dev and ops teams.
- During manual QA and user acceptance testing: Not every regression is code-related; many are visual or usability regressions spotted by humans. The best way to report these issues is with Marker.io, with every bug report automatically sent to your integrated project management tool.

How to perform regression testing (step-by-step)
Every team needs a repeatable, testable process for regression testing. Prioritize your test efforts based on the potential impact and likelihood of failure in a specific part of your software or website.
Here are tried and trusted regression testing techniques/approaches:
Step 1: Identify what changed (code, UI, config, etc.)
Identifying what changed helps you know which part of your system can regress to its former state.
To do that, go through your Pull Request descriptions, commit log, or deployment notes to pinpoint exactly what changed: could be UI elements, logic, config, or updates in your database.
This helps you know what to test because without it, you’re blind. It’s exactly why Marker.io was designed.
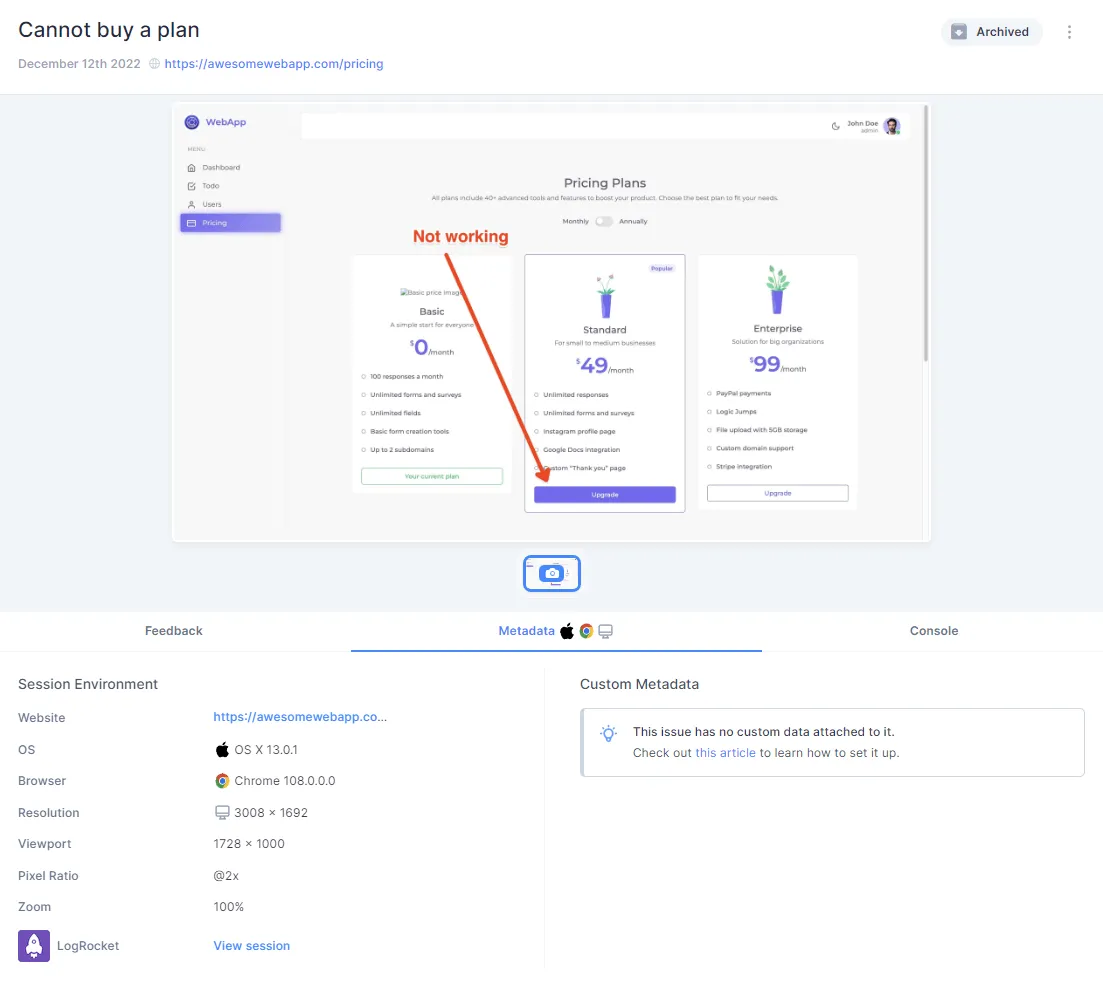
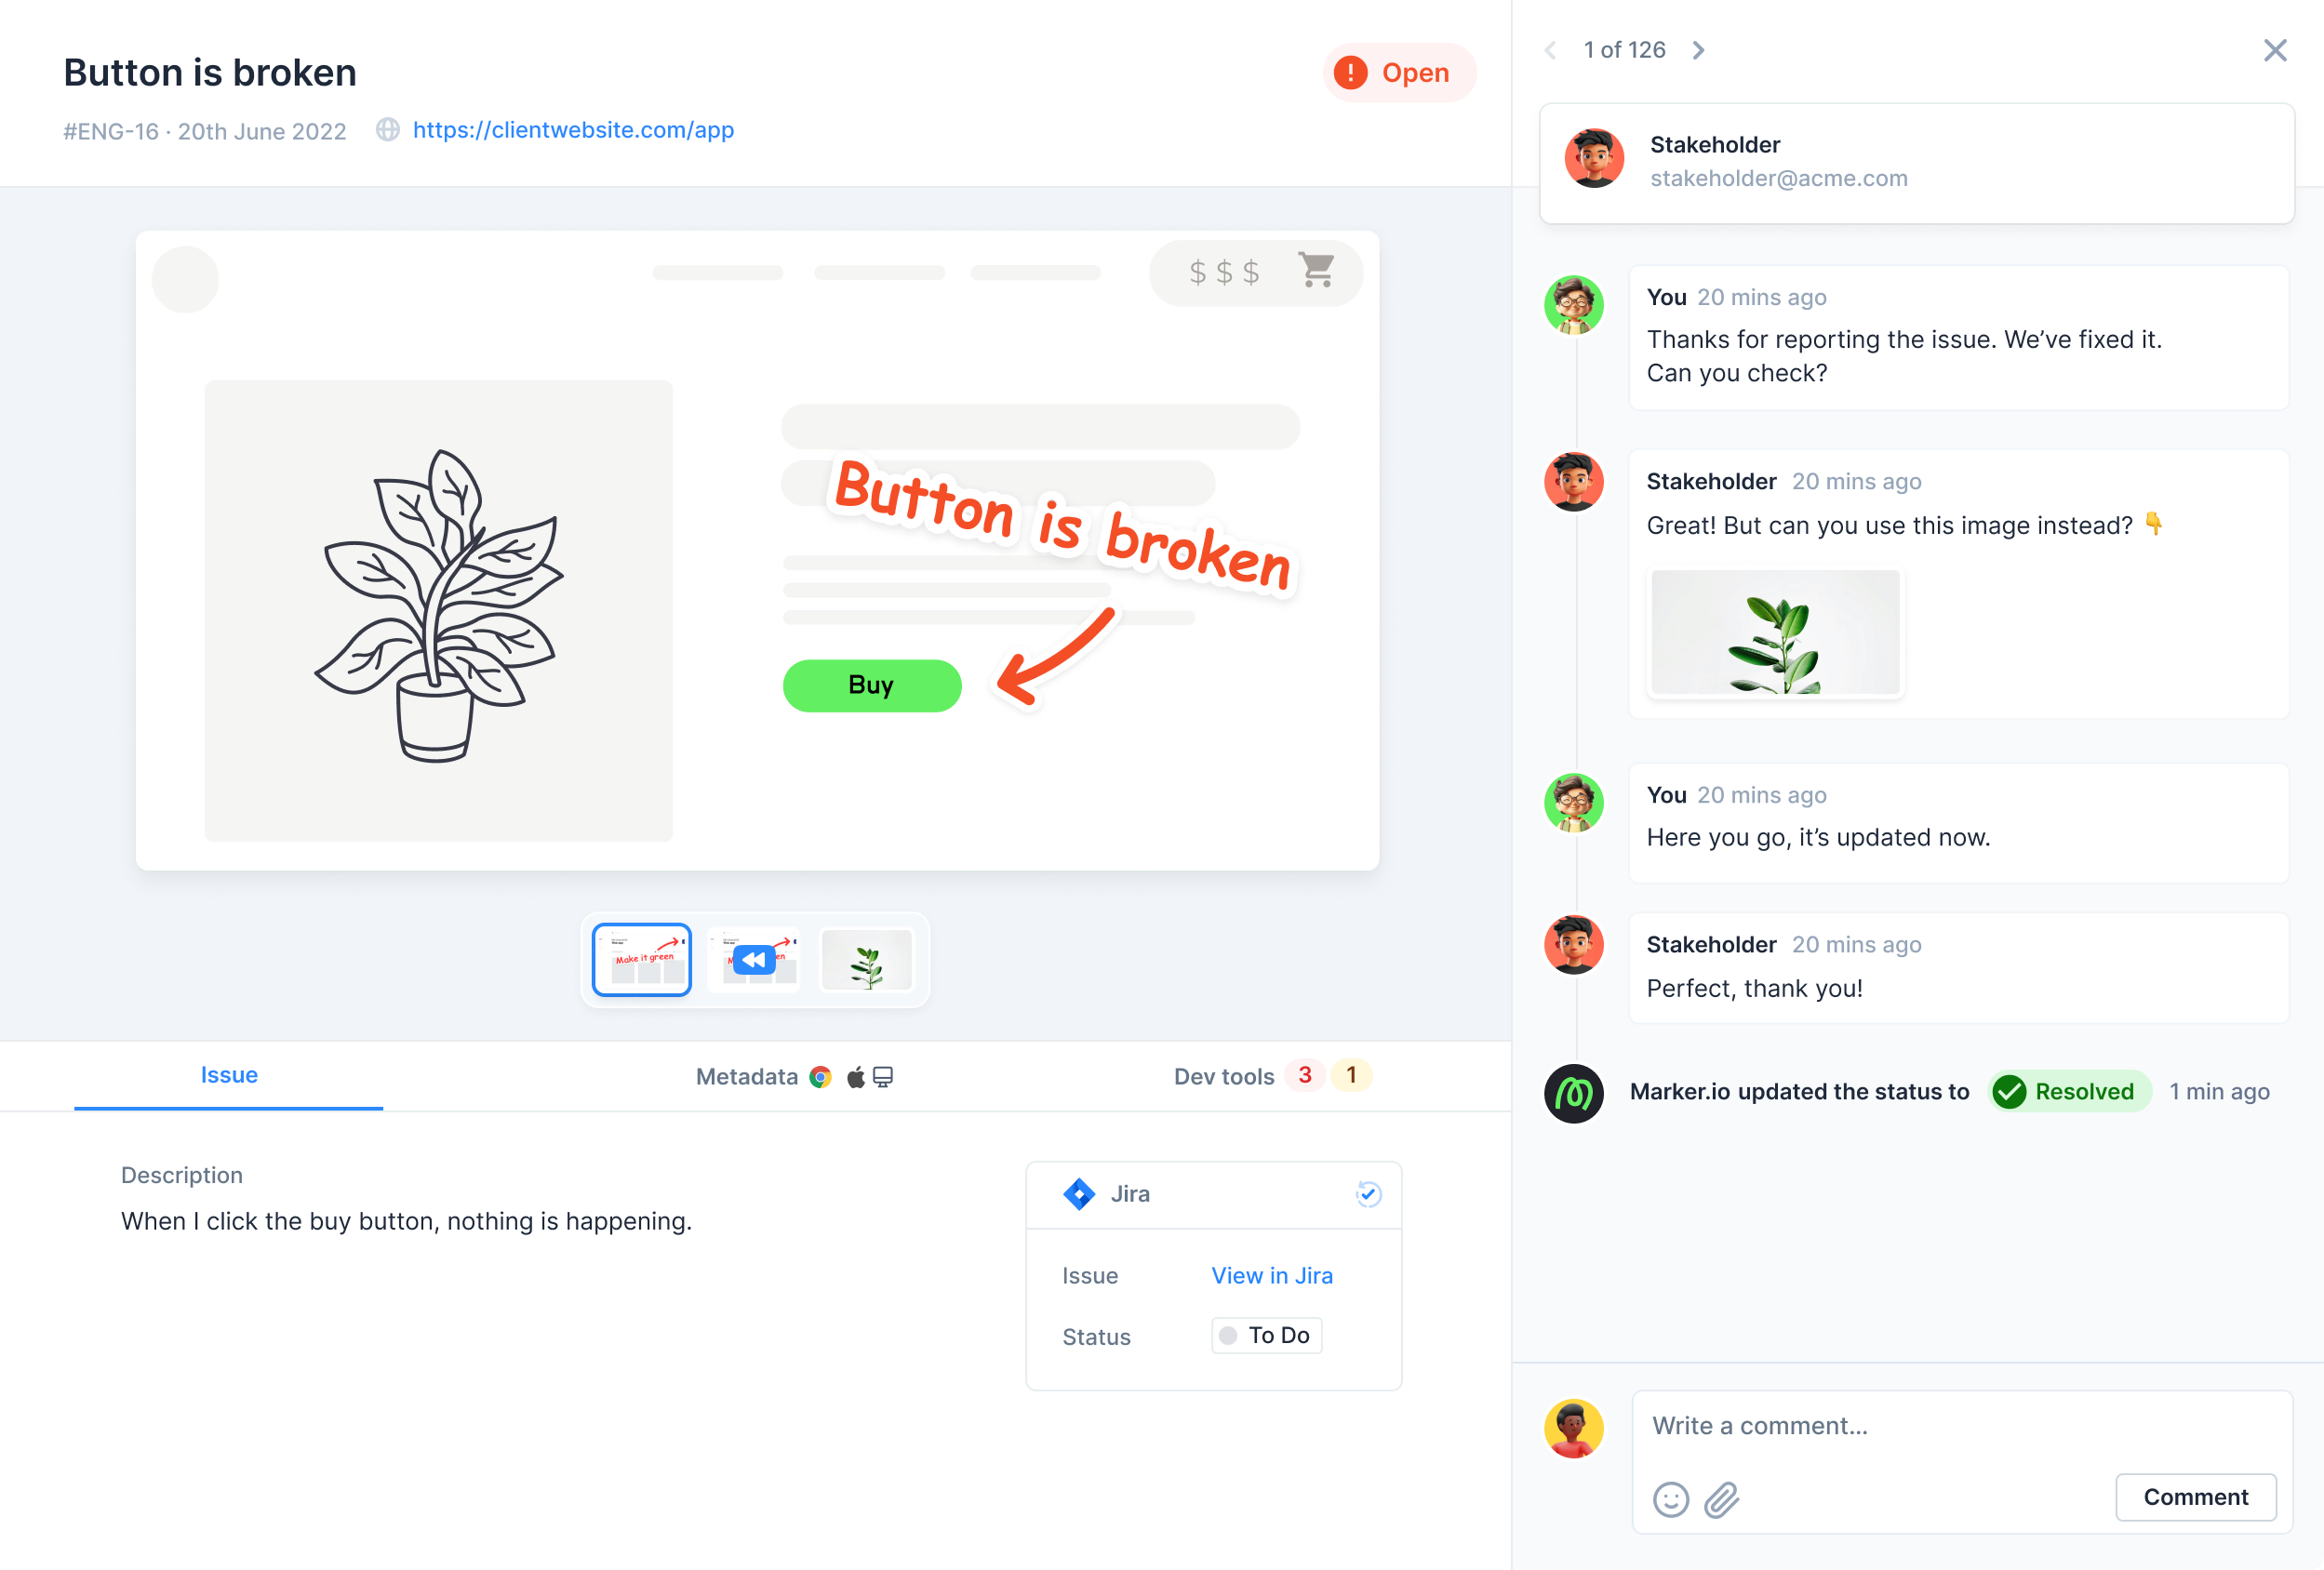
Any team that uses Marker.io can see the actions a client (or user) took and the error they saw so your development team can understand why and troubleshoot the system more easily:
The ease of reporting bugs and UI issues is why agencies and e-commerce brands like L'Oréal say it’s a “no brainer" to have Marker.io on their websites.
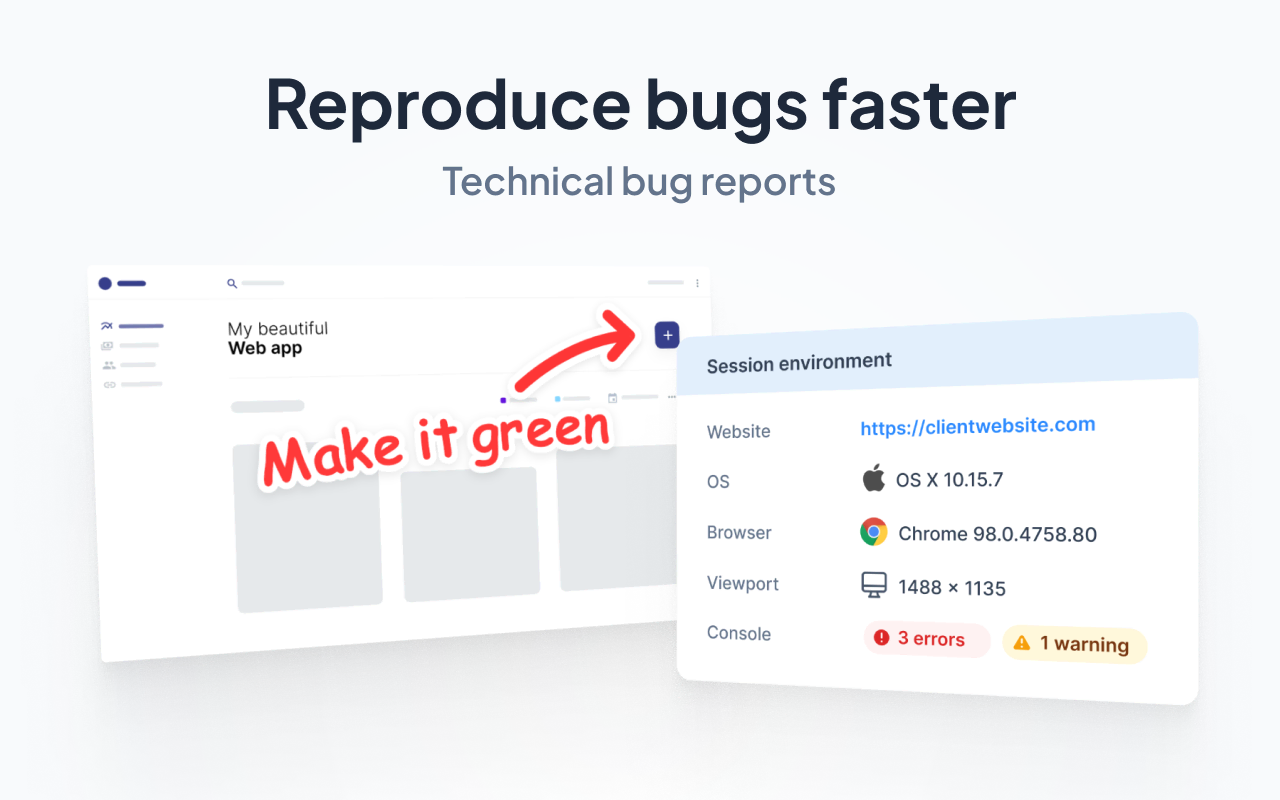
Marker.io also includes details like the view port, browser version, and OS so the developer can understand if the bug is specific to an OS or browser or it can trigger on other devices.
Learn more about Marker.io features.
Step 2: Impact analysis — what could break?
This is where you recognize high risk areas based on the changes you want to make. It pushes you to ask “What depends on those changes?”
For example, the checkout stage for an e-commerce website can lead to loss of revenue if the code breaks. Thinking about this helps you walk through the component graph or check architecture docs to predict what might break (not just what will change).
To do this, use your Git repo’s dependency visualizer or static tools like Sourcegraph or CodeSee.
These help you map which modules depend on the files that changed. You can then review related past bugs in those areas using Jira filters or Git commit messages.
You can use this brief checklist when deciding if a test case or module is impacted:
- Is the changed file imported in a shared component?
- Have there been past bugs in this area?
- Does this change affect critical user flows (checkout, login, dashboard)?
- Are third-party libraries or APIs involved?
- Do test cases already exist for this?
If you check more than 2–3, mark it as “High Risk”.
Since this change affects shared components (or high-risk workflows as the case may be), sync with your dev team.
Confirm what might break and what definitely won’t before assigning the test or escalating the risk.
Step 3: Choose test scope
This is where you decide how much of the system you’ll test based on how big the change is and how far its effect might spread. The categories of test scope include:
- Selective regression testing: Here, you’re testing only critical workflows, e.g. login, checkout, search. These are areas that get the most traffic or are known to break easily. Selective regression testing helps you protect high-impact areas without wasting time on unrelated test scripts.
- Partial regression testing: Test the changed feature plus anything directly connected to it. This is because changes can affect dependent modules.
- Complete regression testing: This is where you test everything in your regression suite. This is for big releases or large code changes that can cause issues anywhere. You can perform this comprehensive test before major launches or after large refactors to protect user experience.
To decide which scope to use, look at your change logs, see the files/modules that were touched, map dependencies, and pick the scope that best works for your needs.
Step 4: Run tests (manual + automated)
Once you know what areas are impacted, run your regression pack for those flows. This could include automated tests for core journeys (via Cypress, Playwright, etc.) and manual checks for edge cases or browser issues.
The manual QA check is where a tool like Marker.io shines. Once you install our widget on your website, your team (or client) can report issues like broken links, styling glitches, or SEO and accessibility concerns directly from the site.
They can annotate their screenshot like this:
And it’ll immediately create a ticket/task in your PM tool:
The project lead can then assign the right person to resolve the issue quickly.
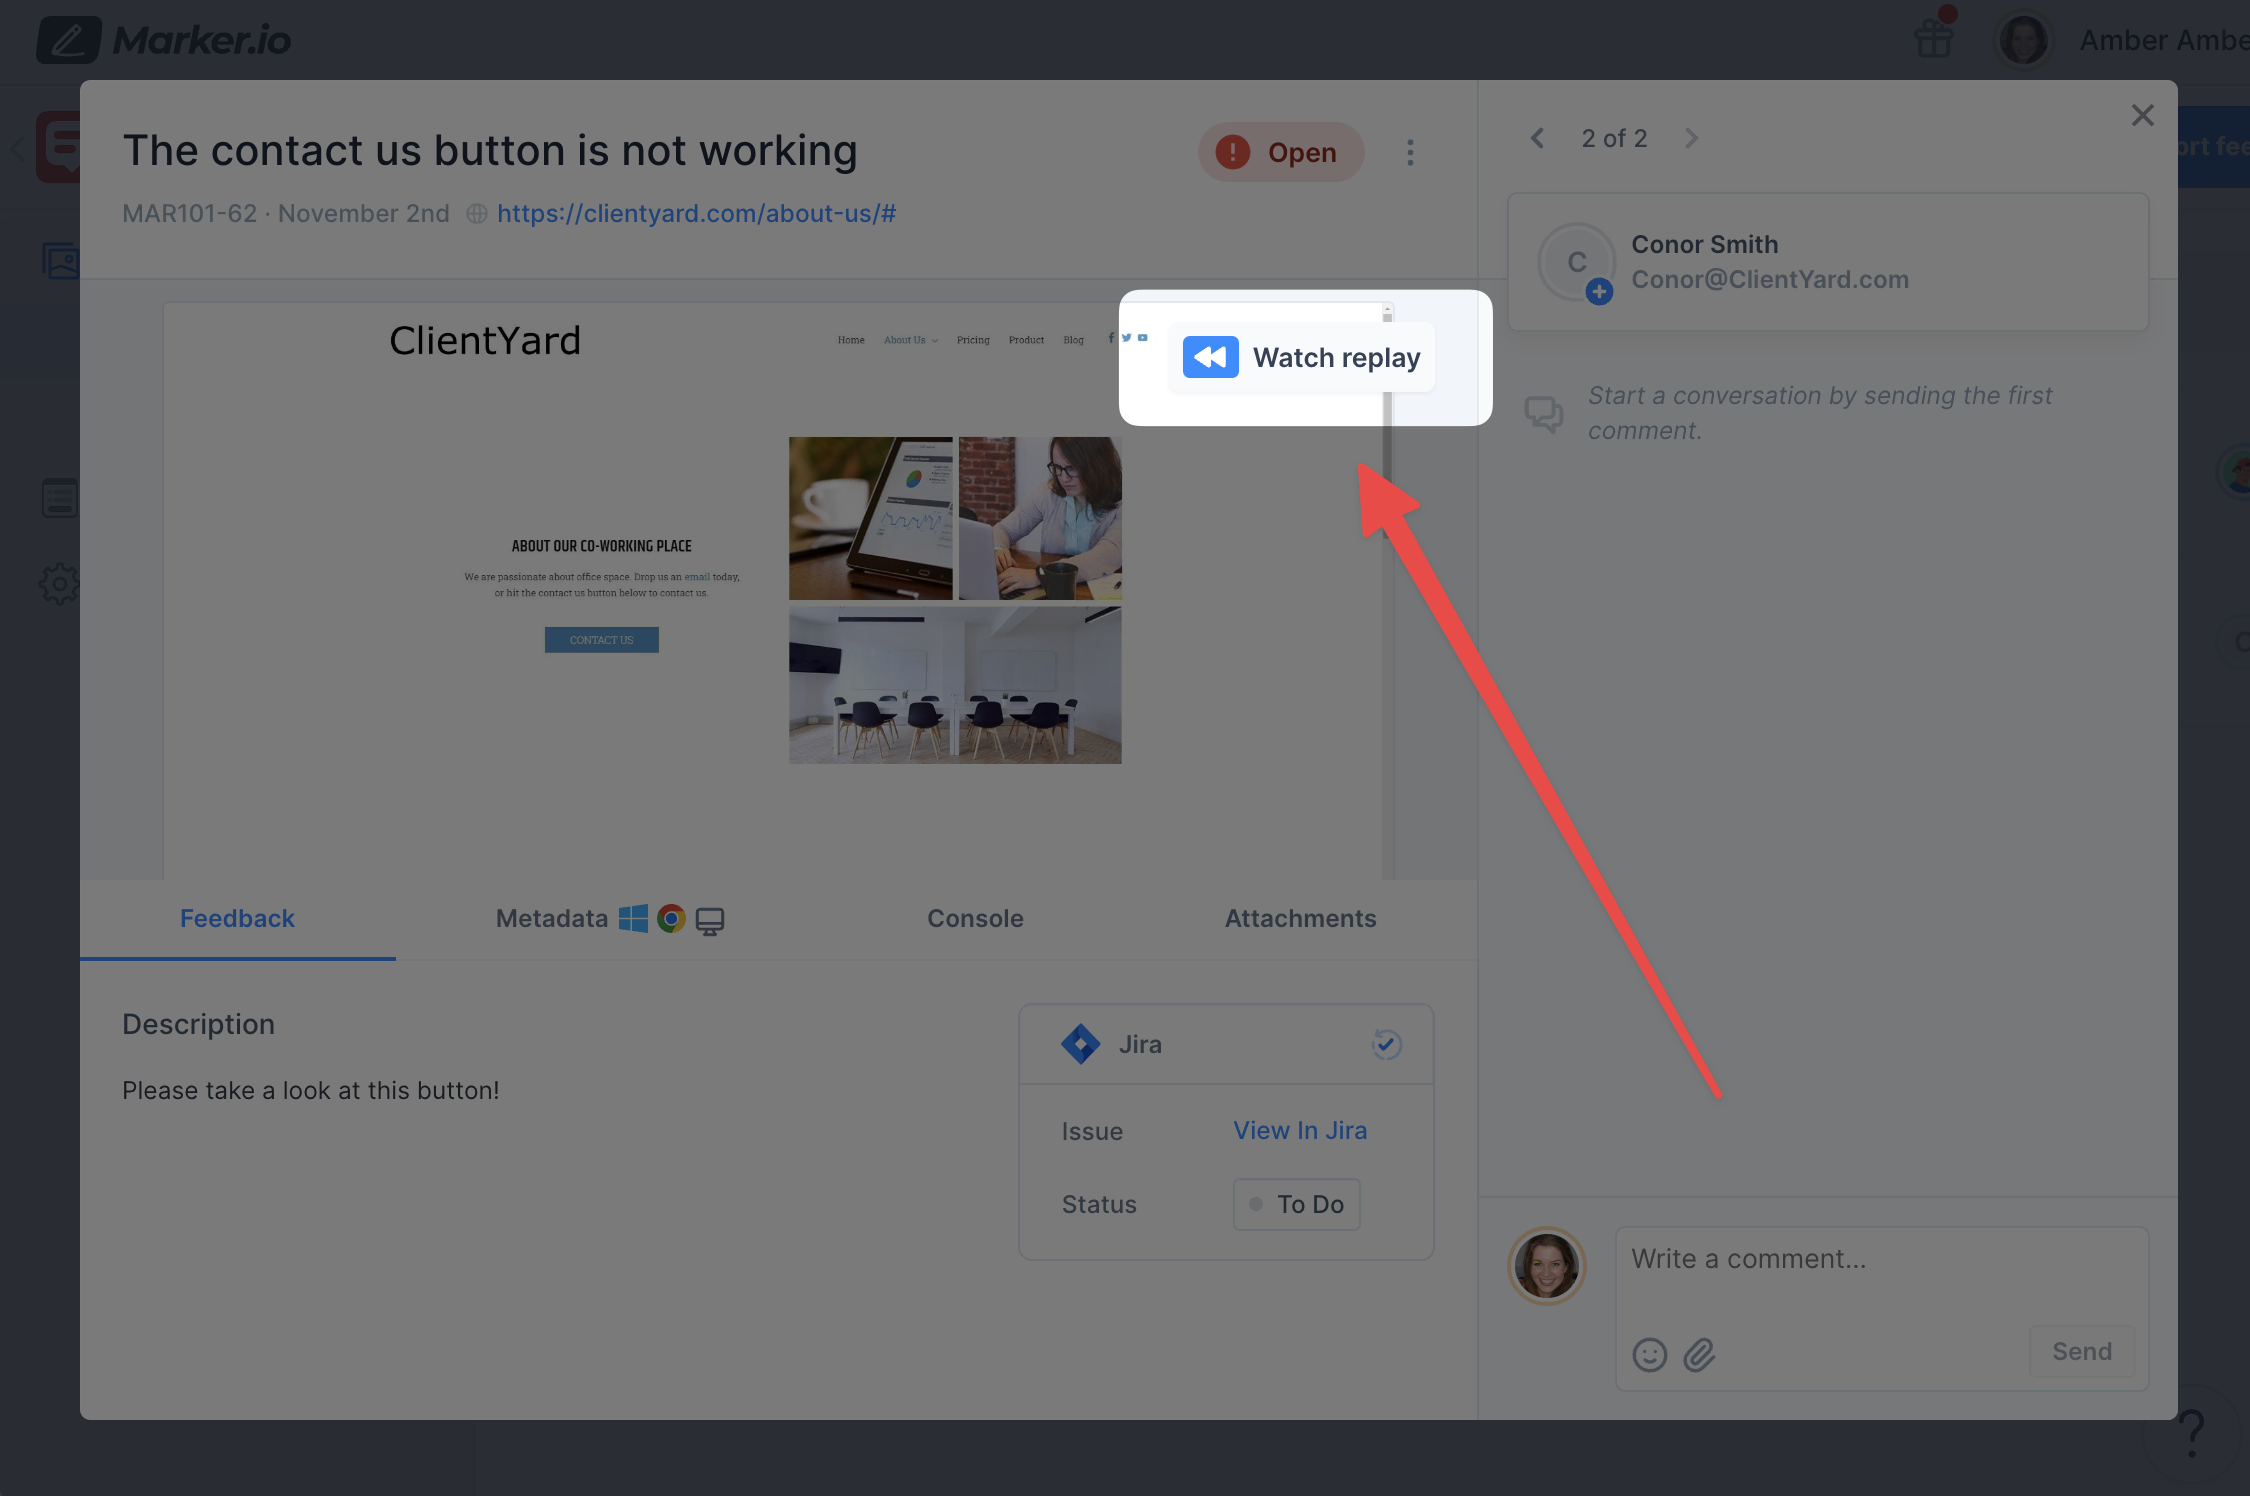
Marker.io also shows a replay session to see the actions taken that triggered the error, which makes it so easy to know why an error was triggered.
This is one of the things Vincent’s team does at L'Oréal through Marker.io. The non-technical team can log reports on site updates, bugs, product updates and launches, A/B testing, ...
...and because Marker.io provides a quality bug report, his team can prioritize and resolve high-risk issues before they escalate.
Read more on how L'Oréal uses marker.io to monitor bugs across 100+ websites.
Step 5: Log bugs clearly
Every bug needs context into:
- Where you clicked.
- Title
- Description
- Steps to reproduce
- What you expected vs. what happened
- Console & network logs
- Environment
- Screenshot or annotated view
This helps you avoid confusing PowerPoint images and vague information so your team can easily understand what needs to be reviewed in the regression testing process.
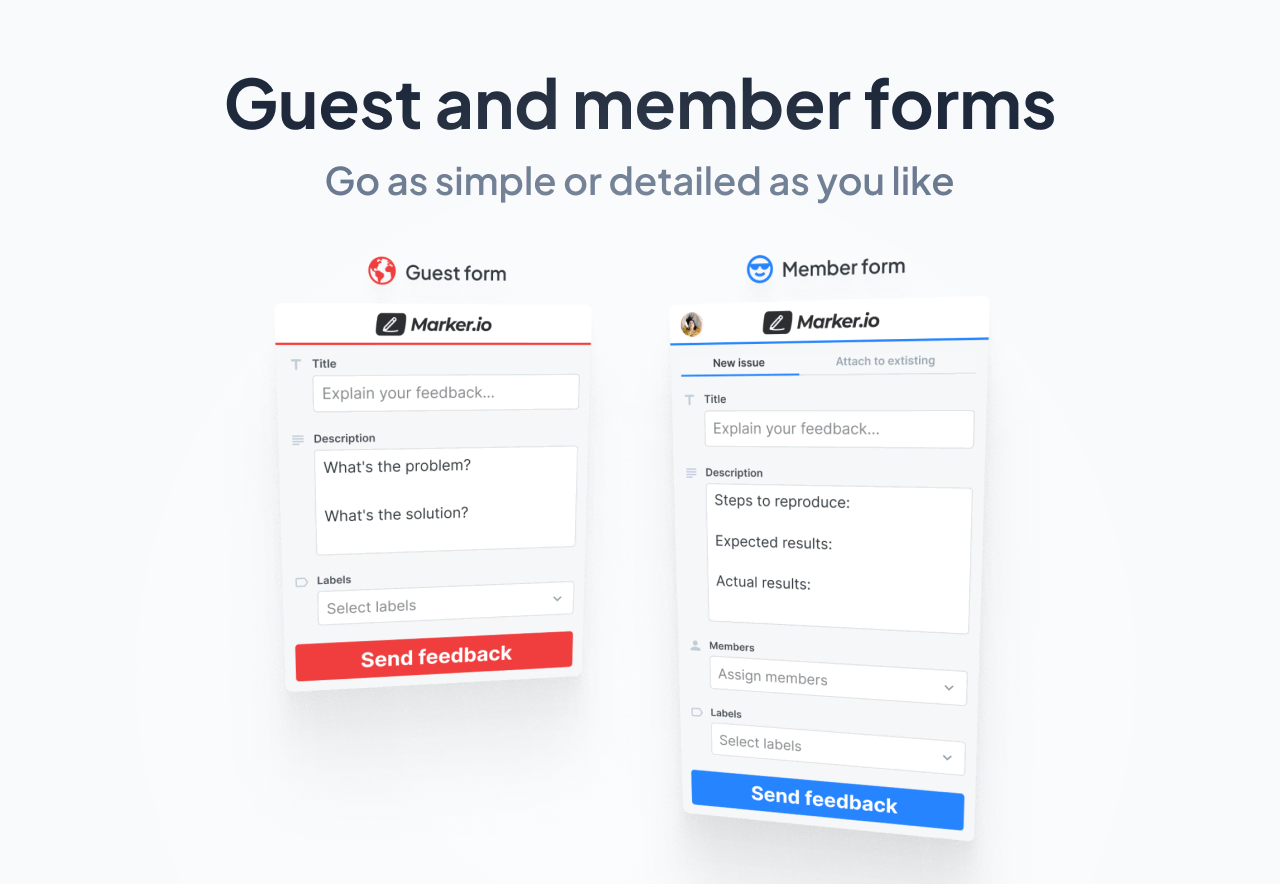
Your client and team may also see different things (or want to add different contexts to the bugs they see).
If you’re using Marker.io, you can add more fields for your team to fill and less fields for your clients, such that it looks like this:
Read more: How to write a bug report.
Step 6: Retest after fixes
After you resolve a broken source code or test script, re-run the regression workflow, at least for that impacted area. Don’t move on until you confirm the fix didn’t break something else.
To do this, automate the retest script if possible. Otherwise, queue it first in the manual regression list for your QA team and use Marker.io to easily log the bugs.
Step 7: Update your regression suite
Your regression testing suite is a set of tests you'll always run to ensure that nothing breaks after changes are made.
So, after every sprint or release, update this suite. Add a test for each bug that slipped through and remove tests for the features you've retired. This helps you keep your regression suite current and lean so your team can run and trust it in the future.
Regression testing tools
You need a tool stack that fits your workflow, scope, and budget.
Here’s a short list of all you need in an automated and manual test environment. If you need a stronger regression testing suite, check out our list of recommended regression testing tools.
Automated tools
1. Selenium
Selenium is an open-source tool for repetitive test cases across different browsers and platforms. It’s flexible in language (functional across Java, Python, JS, C#) and helps you ascertain that new code changes do not break existing functionality.
It also fits any CI (GitHub Actions, Jenkins, GitLab, Azure DevOps), which can help you automate testing across many brands.
2. Cypress
Cypress is an end-to-end testing framework designed for web apps. They enable fast, reliable and easy-to-write automated tests with real-time reloads and debugging capabilities built into the browser.
It's great for UI regression testing (because it executes directly in the browser) and also provides fast feedback loops.
It also integrates well with CI/CD pipelines to catch regressions before deployment and fix issues before they affect user experience.
Manual & visual QA
3. Marker.io
Marker.io is a tool for manual and visual QA tests.
It helps you record visual and UX regressions during manual tests, staging reviews, and UAT, then sends issues directly to your preferred PM tool with screenshots, annotated text, console logs, and device/browser metadata so your developers can get full context at first triage.
This helps your team reduce time-consuming back-and-forth with the client and speed up fixes.
Test management tools
4. Zephyr
Zephyr is a Jira-native test management app that lets you manage functional test cycles and see coverage dashboards without leaving Jira.
It provides simple workflows that PMs, QA, and developers can adopt quickly, and it supports standardized regression packs for consistent runs.
It links user stories (from manual QA), test cases, and defects/bugs end to end, with real-time metrics and dashboards so you can plan, run, and track tests across releases in one place.
How to measure success
When you run regression testing, we recommend tracking outcomes such as website and software stability, upgrades in critical functionalities and better user experience.
This means you should track:
- Bug detection rate.
- Regression bug leak rate.
- Time to resolution.
- Test suite coverage.
- Stakeholder confidence.
Final thoughts
Regression testing is non-negotiable if you want to avoid what happened to OpenAI when they released GPT-5.
If they were an e-commerce brand and GPT-5 was a new product, they may have lost hundreds of thousands in sales within the 24 hour window where the system disappointed users.
Because of this, always perform regression testing every time something changes on your website.
And when you do that, use Marker.io for the manual QA and UAT part of the process so your team can get full visibility into what broke, when, and on which OS it broke.
What should I do now?
Here are three ways you can continue your journey towards delivering bug-free websites:
Check out Marker.io and its features in action.
Read Next-Gen QA: How Companies Can Save Up To $125,000 A Year by adopting better bug reporting and resolution practices (no e-mail required).
Follow us on LinkedIn, YouTube, and X (Twitter) for bite-sized insights on all things QA testing, software development, bug resolution, and more.
Nathan Vander Heyden
Nathan is Head of Marketing at Marker.io. He used to work as a SEO consultant for various SaaS companies—today, he's all about helping Web Ops teams find more efficient ways to deliver bug-free websites.
Related blog posts


Get started now
Free 15-day trial • No credit card required • Cancel anytime