What is a Staging Environment? [Guide & Best Practices]
In this best practice guide, we cover staging environments, their pros and cons, and how staging differs from other development environments.


What is a staging environment?
A staging environment, also known as a staging site, pre-production, or pre-live, is a copy of a new website before it goes live.

A staging environment is a copy of a new website or app that clients, end users, and stakeholders can test before it goes live.
It’s the final stage in website development, allowing developers to gather feedback and bug reports to implement on the live site.
Based on client feedback, developers can make changes, improve functionality, fix bugs, and then deploy the new site.
Related reading: User Acceptance Testing (UAT): Meaning, Definition, Process
In this best practice guide, we’ll go over:
- Setting up a staging environment;
- Pros and cons;
- And how staging differs from other development environments.
What is a staging environment’s purpose?
The purpose of a staging environment is to test a website before it goes live and open to web visitors and search engines.
Getting feedback in a staging environment is a collaborative process that reduces bugs and errors when the site goes live.
Real-time feedback in the staging environment allows for design changes and final modifications to ensure client approval before going live.
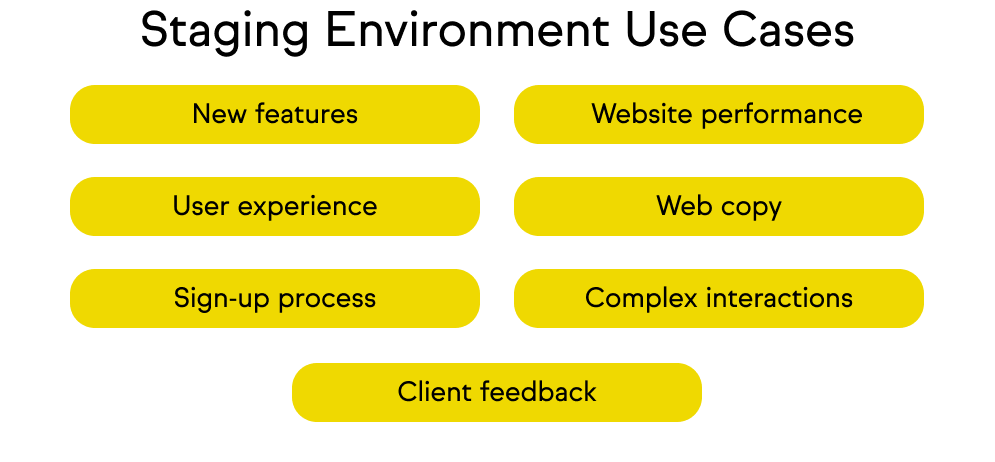
A staging environment is useful for testing the following:
- New website builds;
- New features;
- New functionality;
- Website performance, page load speeds, web accessibility;
- The user experience (UX/UI), and numerous other aspects of a website, including:
- Images (high-quality + acceptable file size)
- Web copy
- The sign-up or download process or contact form
- Basket, checkout, and payment process.
Before giving a client access to a staging site, ensure that internal QA testing has already been done.
A staging site is always separate from the production environment.
Staging environments are exact copies created to collect feedback from stakeholders or testers.
This ensures high-quality and hassle-free website, app, or software launches.
Advantages of a staging environment
There are so many things that can go wrong in production environments.
- Bugs get overlooked
- Bad code going into deployment
- Infrastructure issues preventing code from running smoothly
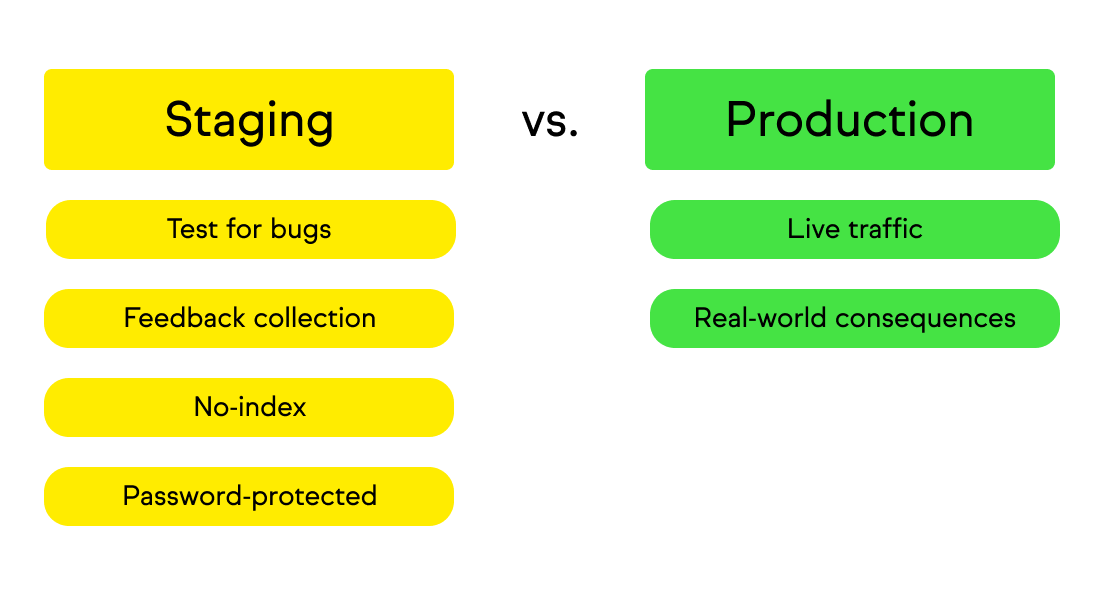
A staging environment is a secure place, protected by passwords and no-index tags to keep it hidden from search engines.
This is where bugs can be found, users can test functionality, and you can collect feedback.
The main advantage is that changes from feedback and bug reports can be implemented—and back for a round of feedback—without real-world consequences.
Once all of that’s done, the client’s happy, and the website is signed-off, then it can go live.
How staging differs from other test environments and production
The development process involves managing multiple test and pre-production environments.
The more complex the project, the more test environments you'll need (think DevOps, continuous integration, and continuous delivery).
Here are the different test and production environments you might need:
Local Environment: An offline environment run on a local machine instead of cloud-based hosting (e.g., AWS, Azure, etc.), so a project can be developed anywhere without an Internet connection.
Anything developed here must be copied to development and other pre-production environments before testing and deployment.
Development Environment: Similar to a local environment, sometimes called a sandbox, where developers can build and test new features or APIs.
Development environments can also be cloud-hosted or private, on platforms like GitHub.
QA/UAT Environment: Testing should start internally (alpha testing, QA/QC) before opening to beta or user acceptance testers (UAT).
A QA or UAT environment is another pre-production environment for testing, deployed similarly to staging, depending on the project's complexity.
Staging Environment: An exact copy of the most recent, post-internal-testing version of a site or app before it goes live.
This is where clients, testers, and other stakeholders can test a site.
After testing, bugs can be fixed and changes made, and a site can go live in the production environment.
Live/Production Environment: The final stage, where the CI/CD version of a website or app is finished and goes into production.
Now, let’s briefly cover how to set up a staging environment and collect feedback and bug reports from clients.
How to set up a staging environment
Whether on a cloud-based platform or self-hosted, your staging environment should be an almost exact copy of production.
Here’s how to set up a staging environment on two popular platforms: WordPress and Webflow.
Pro Tip: To avoid Google indexing the staging site and confusing it with the live site after it’s been deployed, make sure to apply no-index tags.
Setting up a staging environment in WordPress
If you’ve built a client site in WordPress, the easiest way is to create a staging site through your WordPress host.
Popular WP hosts (Elementor Hosting, Bluehost, WP Engine, SiteGround, and Flywheel) offer staging services and dashboards, making it easy to copy the production site.
Another way is to use a WordPress plugin to create a staging version of the production site.
For example, WP Staging or WP Stagecoach are ideal for this and easy to do.
The third way, not recommended for beginners or those short on time, is to manually replicate everything and put a copy of the new site in a staging environment.
Here’s a useful blog for more information: Setting up a WordPress staging environment.
Setting up a staging environment in Webflow
If you’ve built a client site in Webflow, then this process is even easier.
Setting up a staging environment in Webflow (under yoursite.webflow.io) involves these 5 steps:To publish to the staging subdomain without publishing to your custom domain:
- Open your site in the Designer or go to Site settings
- Click Publish
- Check the Webflow staging subdomain (e.g., yoursite.webflow.io)
- Uncheck your custom domain
- Click Publish to select domains
Webflow also shows how to avoid a staging site appearing in SERPs: Learn more about disabling search engine indexing of the Webflow subdomain.
With a staging environment set up, it’s time to gather feedback from clients, users, and stakeholders.
How to gather feedback in a staging environment
There are a number of ways to gather feedback on a new site in a staging environment.
The best way is to use a feedback and bug reporting tool that syncs automatically with your project management software.
Marker.io is a powerful, user-friendly bug-reporting and visual feedback tool for web development agency owners, product, or project managers.

With Marker.io, you can:
- Collect website beta testing bug reports with screenshots and annotations, so changes can be made within the live or staging sites.
- Use session replay to see what a client was doing before they sent a bug or feedback report. Session replay saves time for dev teams, making Marker.io a go-to for client testing.
- Collect data-rich bug reports, including automatic environment and record logs capture.
- Ensure every piece of feedback and bug report is automatically synced with your PM tool of choice (e.g., Jira, GitHub, Trello, Asana, and others).
You can do all of that and so much more with Marker.io.
Save hours on client website feedback, reviews, and approvals— try Marker.io for free today.
Limitations of staging environments

There are some limitations when it comes to testing a site in a staging environment.
- Not an exact duplicate: Although it’s a copy of the production environment, some infrastructure and configurations can’t be exactly the same.
- Limited traffic simulation: In staging, you can only do load/stress testing using specific tools.
- Expensive to maintain for large-scale systems: Staging sites are inexpensive for simple websites but resource-intensive for large ones.
- Difficult to replicate production behavior: This requires integrations with third-party services, production data, etc.
- False confidence: Even if your staging site is flawless, the real production version won’t be exactly the same due to outlined reasons.
Wrapping up…
Staging environments are valuable pre-production or pre-launch environments to test a new website build for bugs and issues.
It involves making a copy of the production version of a site.
This is the final stage of the development lifecycle before it can be published live.
It’s relatively easy to do in WordPress or Webflow, though keep in mind certain limitations of using a staging site.
It remains the best way to gather feedback and fix bugs before going live and is an important step that shouldn’t be skipped.
What should I do now?
Here are three ways you can continue your journey towards delivering bug-free websites:
Check out Marker.io and its features in action.
Read Next-Gen QA: How Companies Can Save Up To $125,000 A Year by adopting better bug reporting and resolution practices (no e-mail required).
Follow us on LinkedIn, YouTube, and X (Twitter) for bite-sized insights on all things QA testing, software development, bug resolution, and more.
Nathan Vander Heyden
Nathan is Head of Marketing at Marker.io. He used to work as a SEO consultant for various SaaS companies—today, he's all about helping Web Ops teams find more efficient ways to deliver bug-free websites.
Related blog posts


Get started now
Free 15-day trial • No credit card required • Cancel anytime