The Ultimate Jira Bug Tracking Tutorial
Jira is incredibly powerful, but it’s not the most intuitive tool. Check out our guide on how to turn Jira into a strong bug tracking tool.


Jira is incredibly powerful, but it’s not the most intuitive tool.
In this tutorial, we’ll give you step-by-step instructions on how to turn Jira into a powerful bug tracking tool.
Jira offers many ways to customize and improve your development process.
Because of this, when it comes to bug tracking, there are a number of problems and mistakes that keep getting made.
As a result, bug reports are often difficult to organize and resolve by your software engineers.
So, whether you are a product manager trying to keep projects organized or a reporter trying to get bug reports right the first time, this post is for you!
Jira Bug Tracking Tutorial
Follow these simple steps to configure Jira into a powerful defect management system for your development team.
1. Set up a bug tracking project in Jira
Setting up a bug tracking project in Jira Software is relatively uncomplicated.
- Log in to your organization’s workspace. The URL looks something like this: your-organization.atlassian.net/jira.
- In the toolbar at the top, click “Projects”, then “Create Project”.
- Under “Project Templates”, choose “Software Development”, then “Bug Tracking”.
- Click “Use Template”, then choose a name and a key.
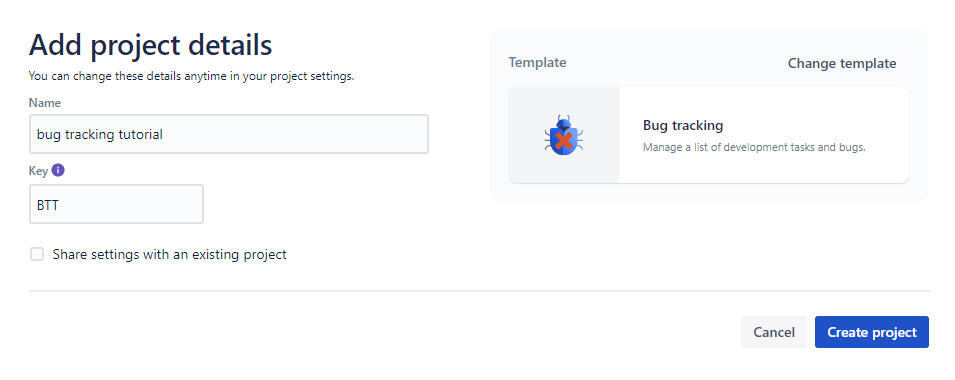
- Click “Create Project”, and you’re good to go!
This project is now your dedicated bug tracker.
This is where your QA team and clients will report and track bugs and issues going forward—for the entire software development lifecycle.
Tell them: if it doesn’t exist there, then it doesn’t exist at all. This is your one and only source of truth.
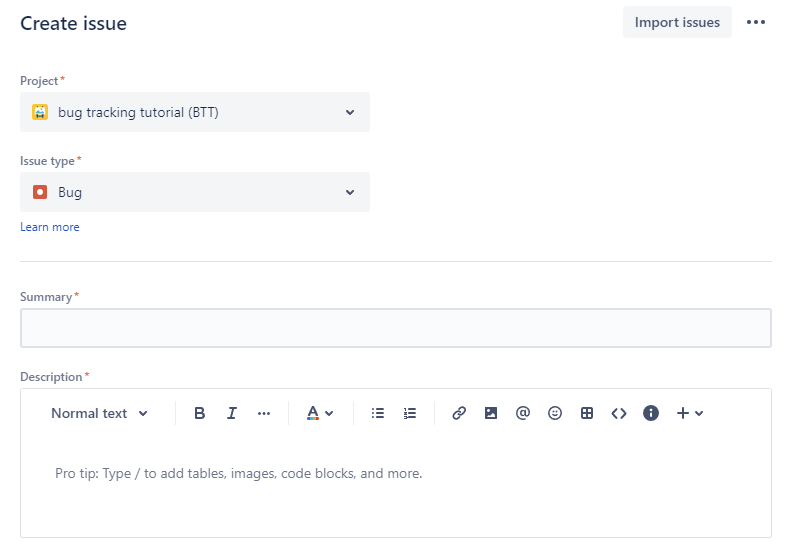
With this setup, you can already create issues.
The default screen includes:
- Issue Type (bug, new feature request, improvement…)
- Summary
- and Description.
With a little extra customization, you can add assignee, sub-task, epic… but that’s for later!
Next, let’s have a look at our workflow.
2. Create custom Jira workflows
Setting up a custom workflow in Jira is also relatively easy.
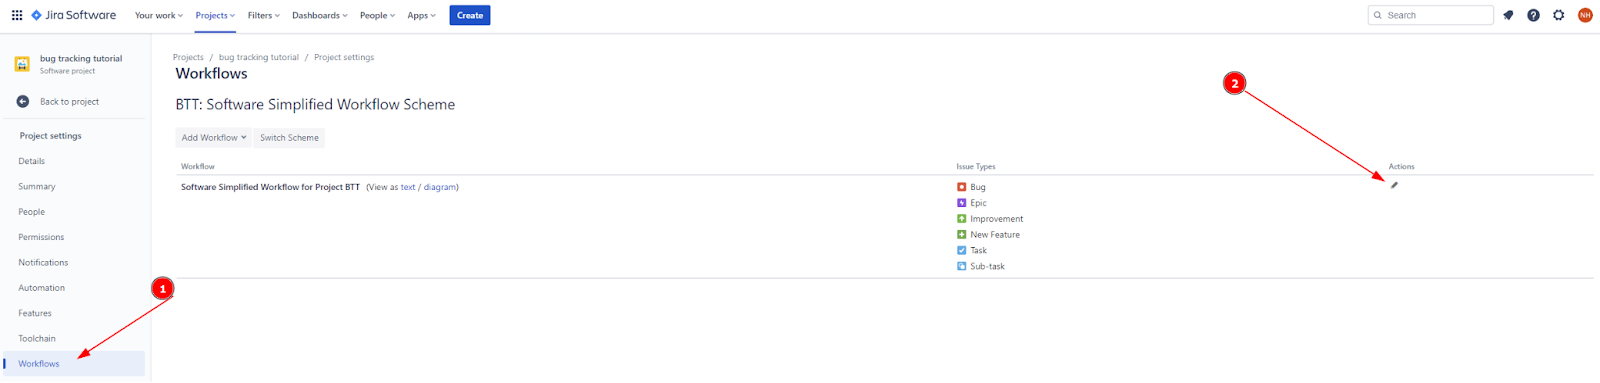
- On the left side of the screen, go in “Project settings”, then “Worfklows” and click the icon under “Actions.”
- Create as many statuses as you like, and don’t forget to set transitions to “All” so that statuses can be switched back and forth. Here, we’ve opted for a Jira workflow with few, but easy-to-follow steps: “To Do”, “Assigned”, “In Progress”, and “Done”.
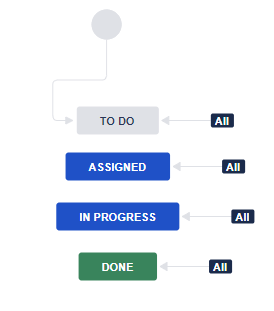
- Congratulations! You Jira workflow is live, and you can now set a custom status for all of your issues.

3. Create a Kanban board
The default “table” view is not great for keeping a visual overview of all issues.
Let’s create a Kanban board that will make it easy to keep an eye on everything.
- On the left, click “Boards”, then “Create board”.

- Pick “Kanban”, then “Board from an existing project”.
- Name your board (here, “bug tracker board”) and link it to your current project.
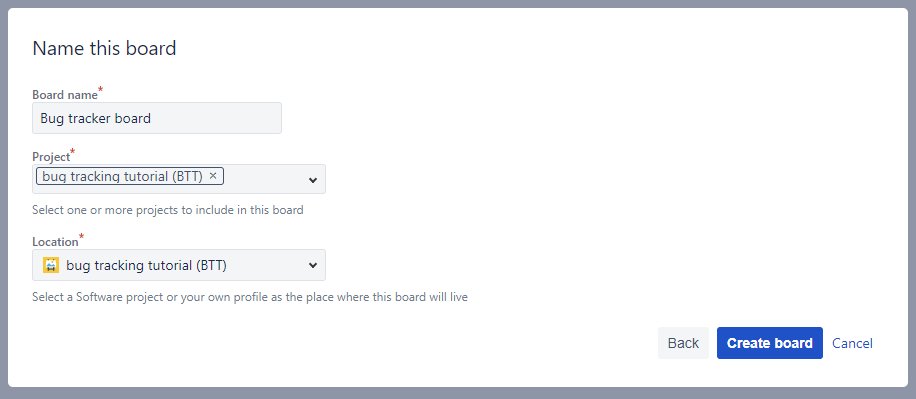
- And done! Now, this finally looks like a decent bug tracking tool.
You can edit issues straight from the board, and track the entire bug life cycle with ease.
Feel free to add as many user stories, as well as all the relevant details straight from your Kanban board.
Jira also has options for a Scrum board if that’s your favorite way of working.
Resolving bugs has never been so easy. When working with these clearly defined stages, prioritizing bugs gets easier—and faster.
4. Create custom issue types in Jira
If you wanna go one step further and have specific issue types (for example, Test Case), you’ll have to create your very own custom issue type.
Here’s how to do this with Jira Software:
- Inside Jira go to “Global Settings” and “Issues”.
- Click “Add Issue Type” and create a new issue type.
- Go to “Issue Type Scheme” settings, find your Jira Project, and click “Edit”.
- Drag your new Issue type into your project’s current scheme.
- Next, go to “Screen settings”, and “Add Screen”.
- Pick the custom fields you want in this Issue type, (e.g. Summary, Description, Priority). Keep it simple, but always include Summary and Description.
- Go to “Screen Schemes” and “Add Screen Schemes”, create a new Screen scheme, and link it to your custom Screen.
- Go to “Issue Type Screen Scheme” and click on the Jira Classic project you are looking to use your new Issue type with, then “Associate an issue type with a screen scheme”, select your new issue type and its Screen Scheme, then click “Add”.
- Congratulations! You created a new custom Jira issue type with custom fields, scoped to a specific Jira project.
5. Create a system to prioritize bugs
Issue tracking is not just about creating a bug report and sending it off to your project management tool.
Agile projects want to be able to prioritize newly created issues as soon as possible.
Ideally, all reporters have a good grip on the level of bug severity. Unfortunately, that is often not the case!
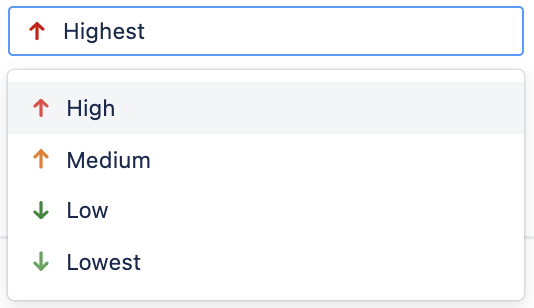
We decided to go with a classic system for all of our Jira bugs:
- Highest
- High
- Medium
- Low
- Lowest
Reporting bugs in Jira Software
Now that you’ve successfully turned Jira into a strong defect tracking tool, it’s time to start reporting bugs.
It’s good to think about the people in charge of reporting bugs. There are generally two types of reporters:
- People with access to your Jira projects and backlog, such as your development team and your project manager;
- People without access to your Jira projects (your clients).
1. Bug reporting for Jira users
For Jira users, you can let them report straight into the correct Jira project in real-time. They have permissions, understand how it works, and what the issue types mean.
However, reporting issues and bugs into Jira is time-consuming.
A regular bug reporting flow looks something like this:
- Go to staging, find a bug.
- Take a screenshot.
- Go to Figma/Photoshop… and import the screenshot.
- Annotate it.
- Paste the annotated screenshot into a new Jira bug report.
- Assign the issue to the correct person, and add labels (functionality issue, design problem…).
- Type out long explanations and all issue details, as well as multiple tasks.
- Add technical info manually.
- Save and send it off to the developers.
If you don't want them to spend the time doing all this, you can always opt for automation—with a bug reporting tool like Marker.io.
Reporting bugs with Marker.io is a simple, 3-steps process:
- Find a bug, click the button.
- Fill out the bug report and input issue details.
- Click on “Create issue”—done!
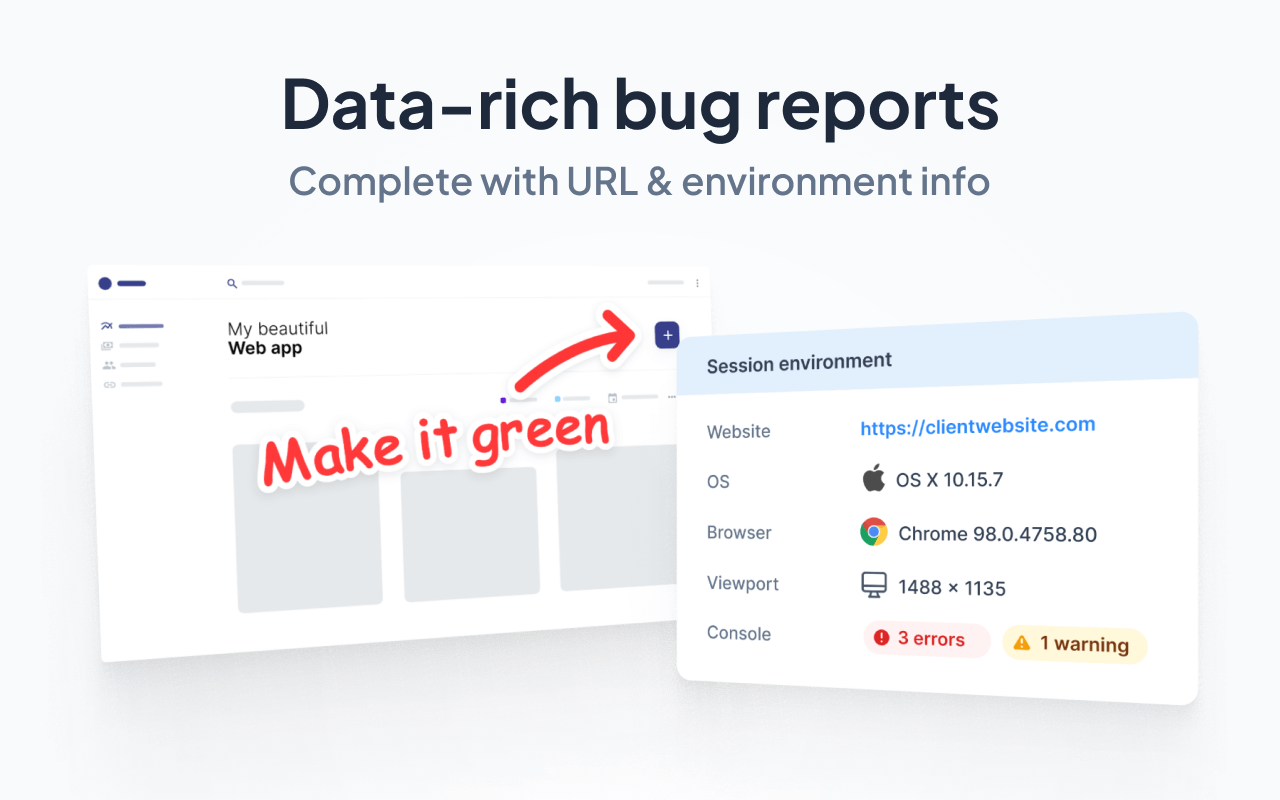
Any bug report created this way will land straight into your Jira project, with all technical data attached.
This means developers can stay in Jira, not adopt another tool, and do what they do best: bug fixing!
2. Bug reporting for non-Jira users
For reporters without access to Jira, you have two options.
- Request detailed emails that one of your team members transfers into Jira. Hint: you can automatically create Jira issues from email, too.
- You let them the Marker.io plugin as well.
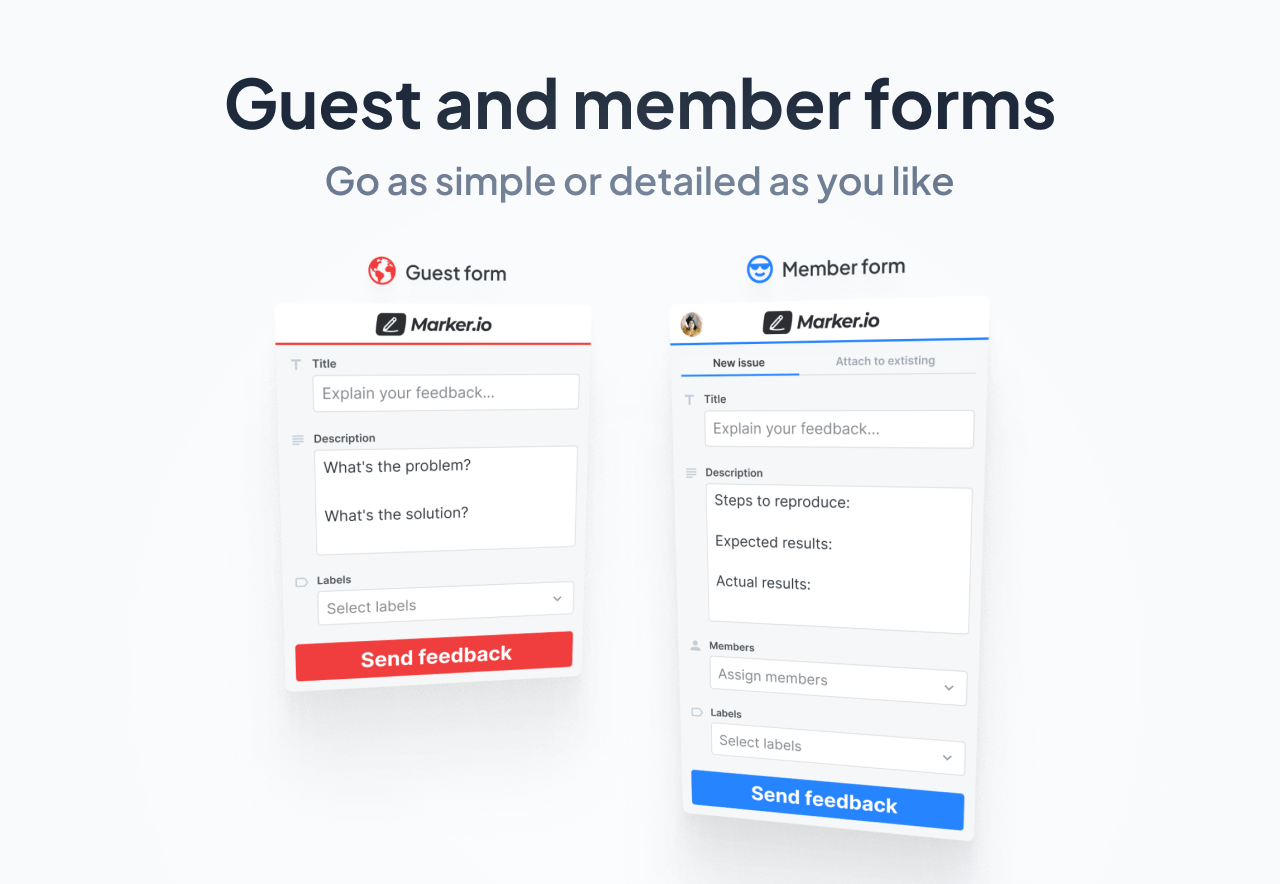
With Marker.io, you can invite your clients and external testers as Guests.
This means that they see a limited submission form so internal details stay secure, and you still get all the information you need sent straight into your Jira.
With Guests, it is definitely advisable to set up a dedicated, separate Jira project for issue tracking.
The PM can easily go in and check the issues before sending them to the devs! This is an extra step that saves you a lot of time in the long run.
Communicating on issues within Jira
Bug tracking in Jira is just one part of the equation.
A good communication process between development team, project manager, and client is paramount to your success.
One of the biggest problems with Jira for bug reporting is that you need to do a lot of alt-tabbing between tools to collect all information.
You might have seen an issue like this…

This will easily turn your developers crazy.
Developers need a baseline if they want to fix bugs in a timely fashion!
If you want to reduce time-wasting phone calls and frustrated developers, you need to be concise and complete at the same time.
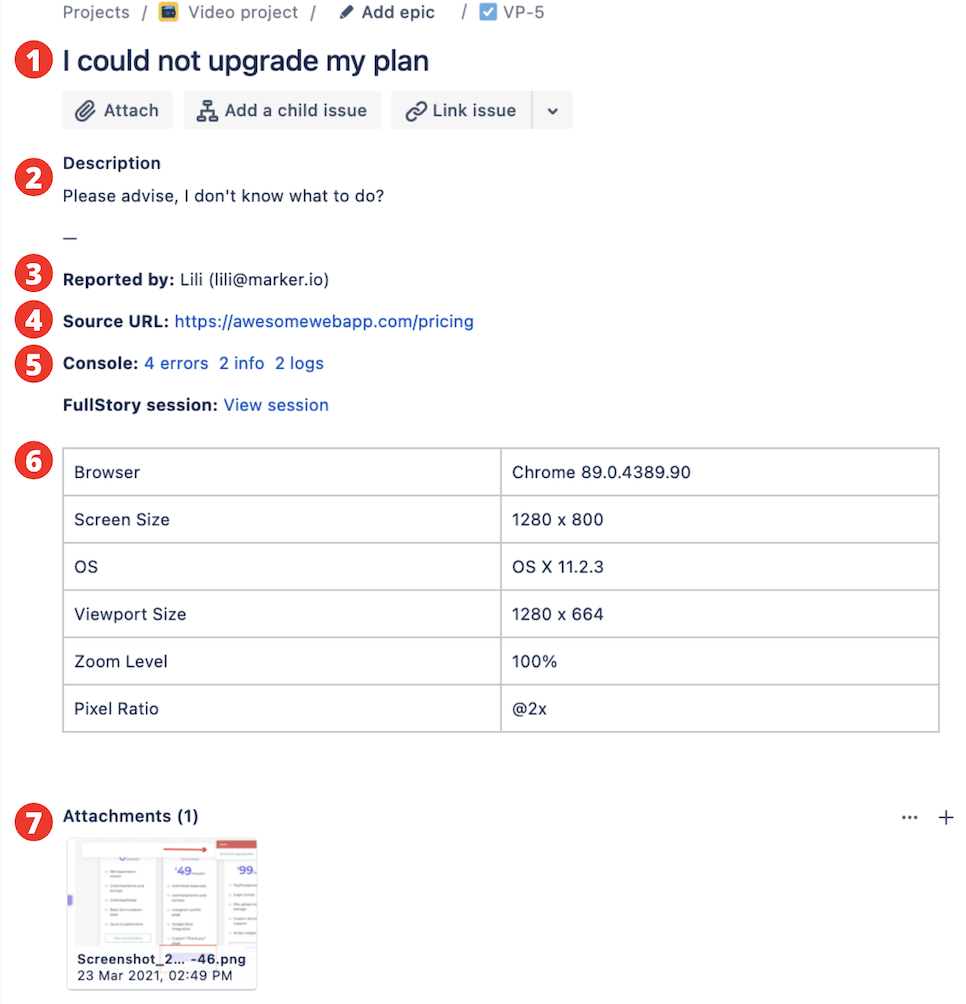
In order to write the perfect bug report, you’ll need to attach this information at the very least:
- Title
- Description/Summary
- Reporter information
- Source URL
- Console logs
- Environment: browser, operating system, zoom level, and screen size
- Screenshot/visual proof
Hint: use one of our pre-made bug report templates to make sure you didn’t miss anything.
Want your developers to love you?
Tickets you create via Marker.io automatically get enriched with technical metadata and console logs.
Need to discuss a particular issue at length?
In most cases, teams resort to long email chains or phone calls.
If you use a tool like Marker.io though, you can discuss issues straight from the dashboard.

And thanks to our advanced 2-way sync, all messages from your clients or external reporters will land straight into Jira.
Super helpful when you’re trying to work fast.
Resolving bugs and notifying clients
After you or your developers close a Jira issue, you need to notify the reporter.
This also prevents impatient follow-up emails or calls.
It is always advisable to use the same channels of communication as you used before.
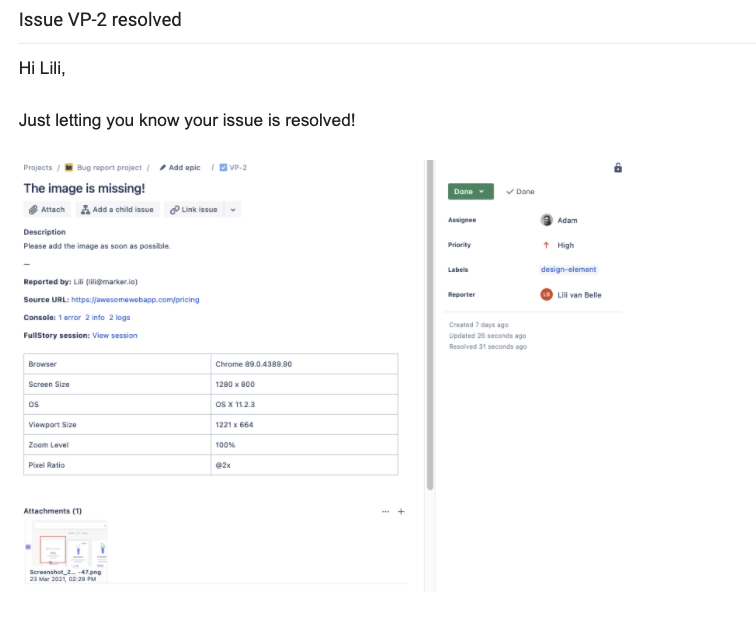
Option 1: Email
It is an obvious choice, and with good reason. People check their emails all the time.
When sending emails, always attach:
- The issue number
- The title
- A screenshot of the issue before it got resolved
This is especially relevant when working with people who have no access to your Jira. They tend to forget the details of what they reported.
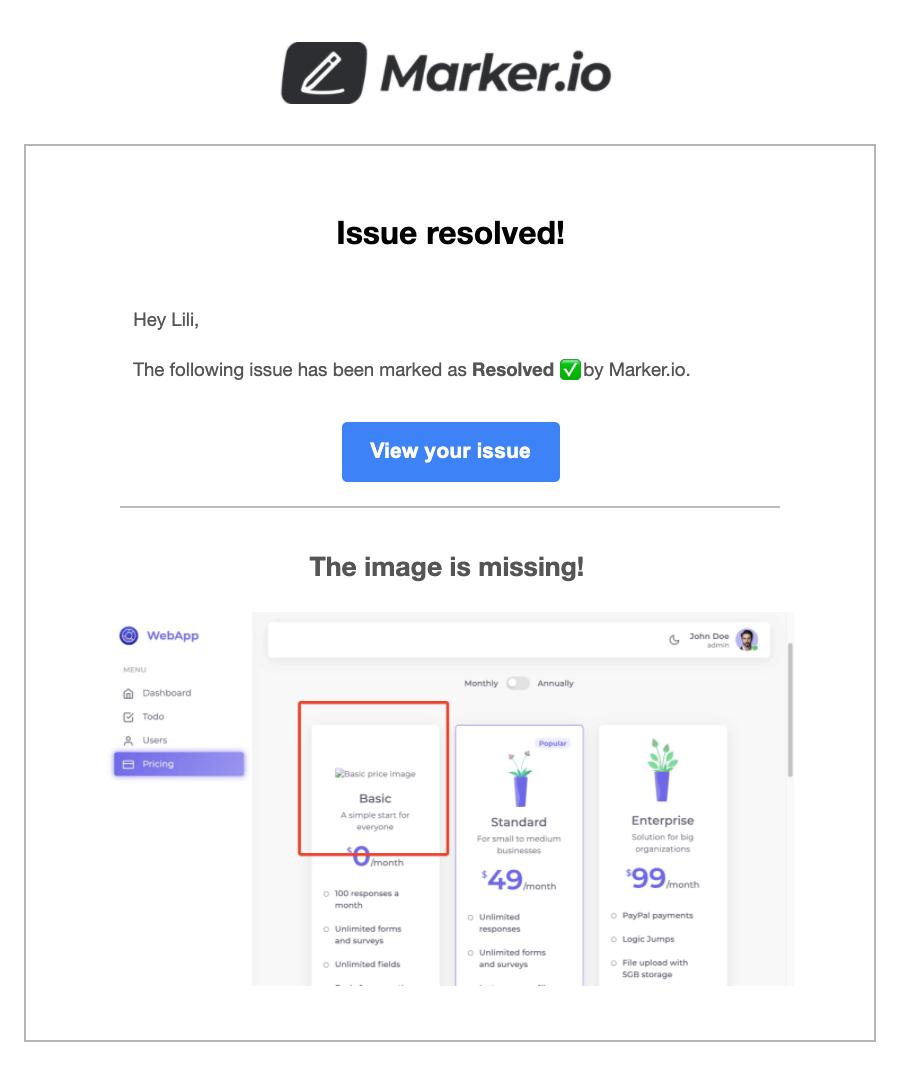
Option 2: Marker.io
Marker.io comes with automated status sync.
This means that when you close an issue in Jira, it automatically also closes in Marker.io.
Your reporters will receive notifications through automated email or Guest Portal updates. A good way to save time!
Your next steps
- Set up a bug tracking project in Jira, using the tutorial above.
- Sign up for Marker.io for Jira—and report bugs twice as fast.
- Let us know what you think about this article via Twitter or e-mail!
Jira as a project management system is as popular as it is for good reason!
It is powerful, highly customizable, and allows complex workflows with ease. We hope this guide helped you turn it into a solid bug tracking tool.
For bug reporting, either set up a strict flow with a dedicated PM or get a visual bug reporting tool like Marker.io.
When deciding on the best bug reporting tool, take into account if you want everything to get two-way synced with your Jira account, or if you want a separate tool.
With Marker.io, you get a powerful two-way sync, easy collaboration with clients and non-technical team members… and happy developers.
What should I do now?
Here are three ways you can continue your journey towards delivering bug-free websites:
Check out Marker.io and its features in action.
Read Next-Gen QA: How Companies Can Save Up To $125,000 A Year by adopting better bug reporting and resolution practices (no e-mail required).
Follow us on LinkedIn, YouTube, and X (Twitter) for bite-sized insights on all things QA testing, software development, bug resolution, and more.
Nathan Vander Heyden
Nathan is Head of Marketing at Marker.io. He used to work as a SEO consultant for various SaaS companies—today, he's all about helping Web Ops teams find more efficient ways to deliver bug-free websites.
Related blog posts


Get started now
Free 15-day trial • No credit card required • Cancel anytime