How to integrate Marker.io in your web app (New Browser SDK)
Collecting user feedback from web applications directly to your project management tool has never been so easy.


Today, we are super happy to announce the release of our brand-new Marker.io Browser SDK! Collecting user feedback from web applications directly to your project management tool has never been so easy.
In this article, we'll talk about how to create custom feedback buttons 🎨, add extra context to your issues (custom metadata 👀), and identify your reporters from the JavaScript Browser SDK 🕵️.
Let's get started!
Loading our widget using the SDK
The easiest way to get started with the SDK is installing it from npm, to do so, run the following inside your project folder:
This will install the SDK locally and link it to your project dependencies.
That's it, we're ready to load a Marker.io widget in our app! 🚀
Here's how:
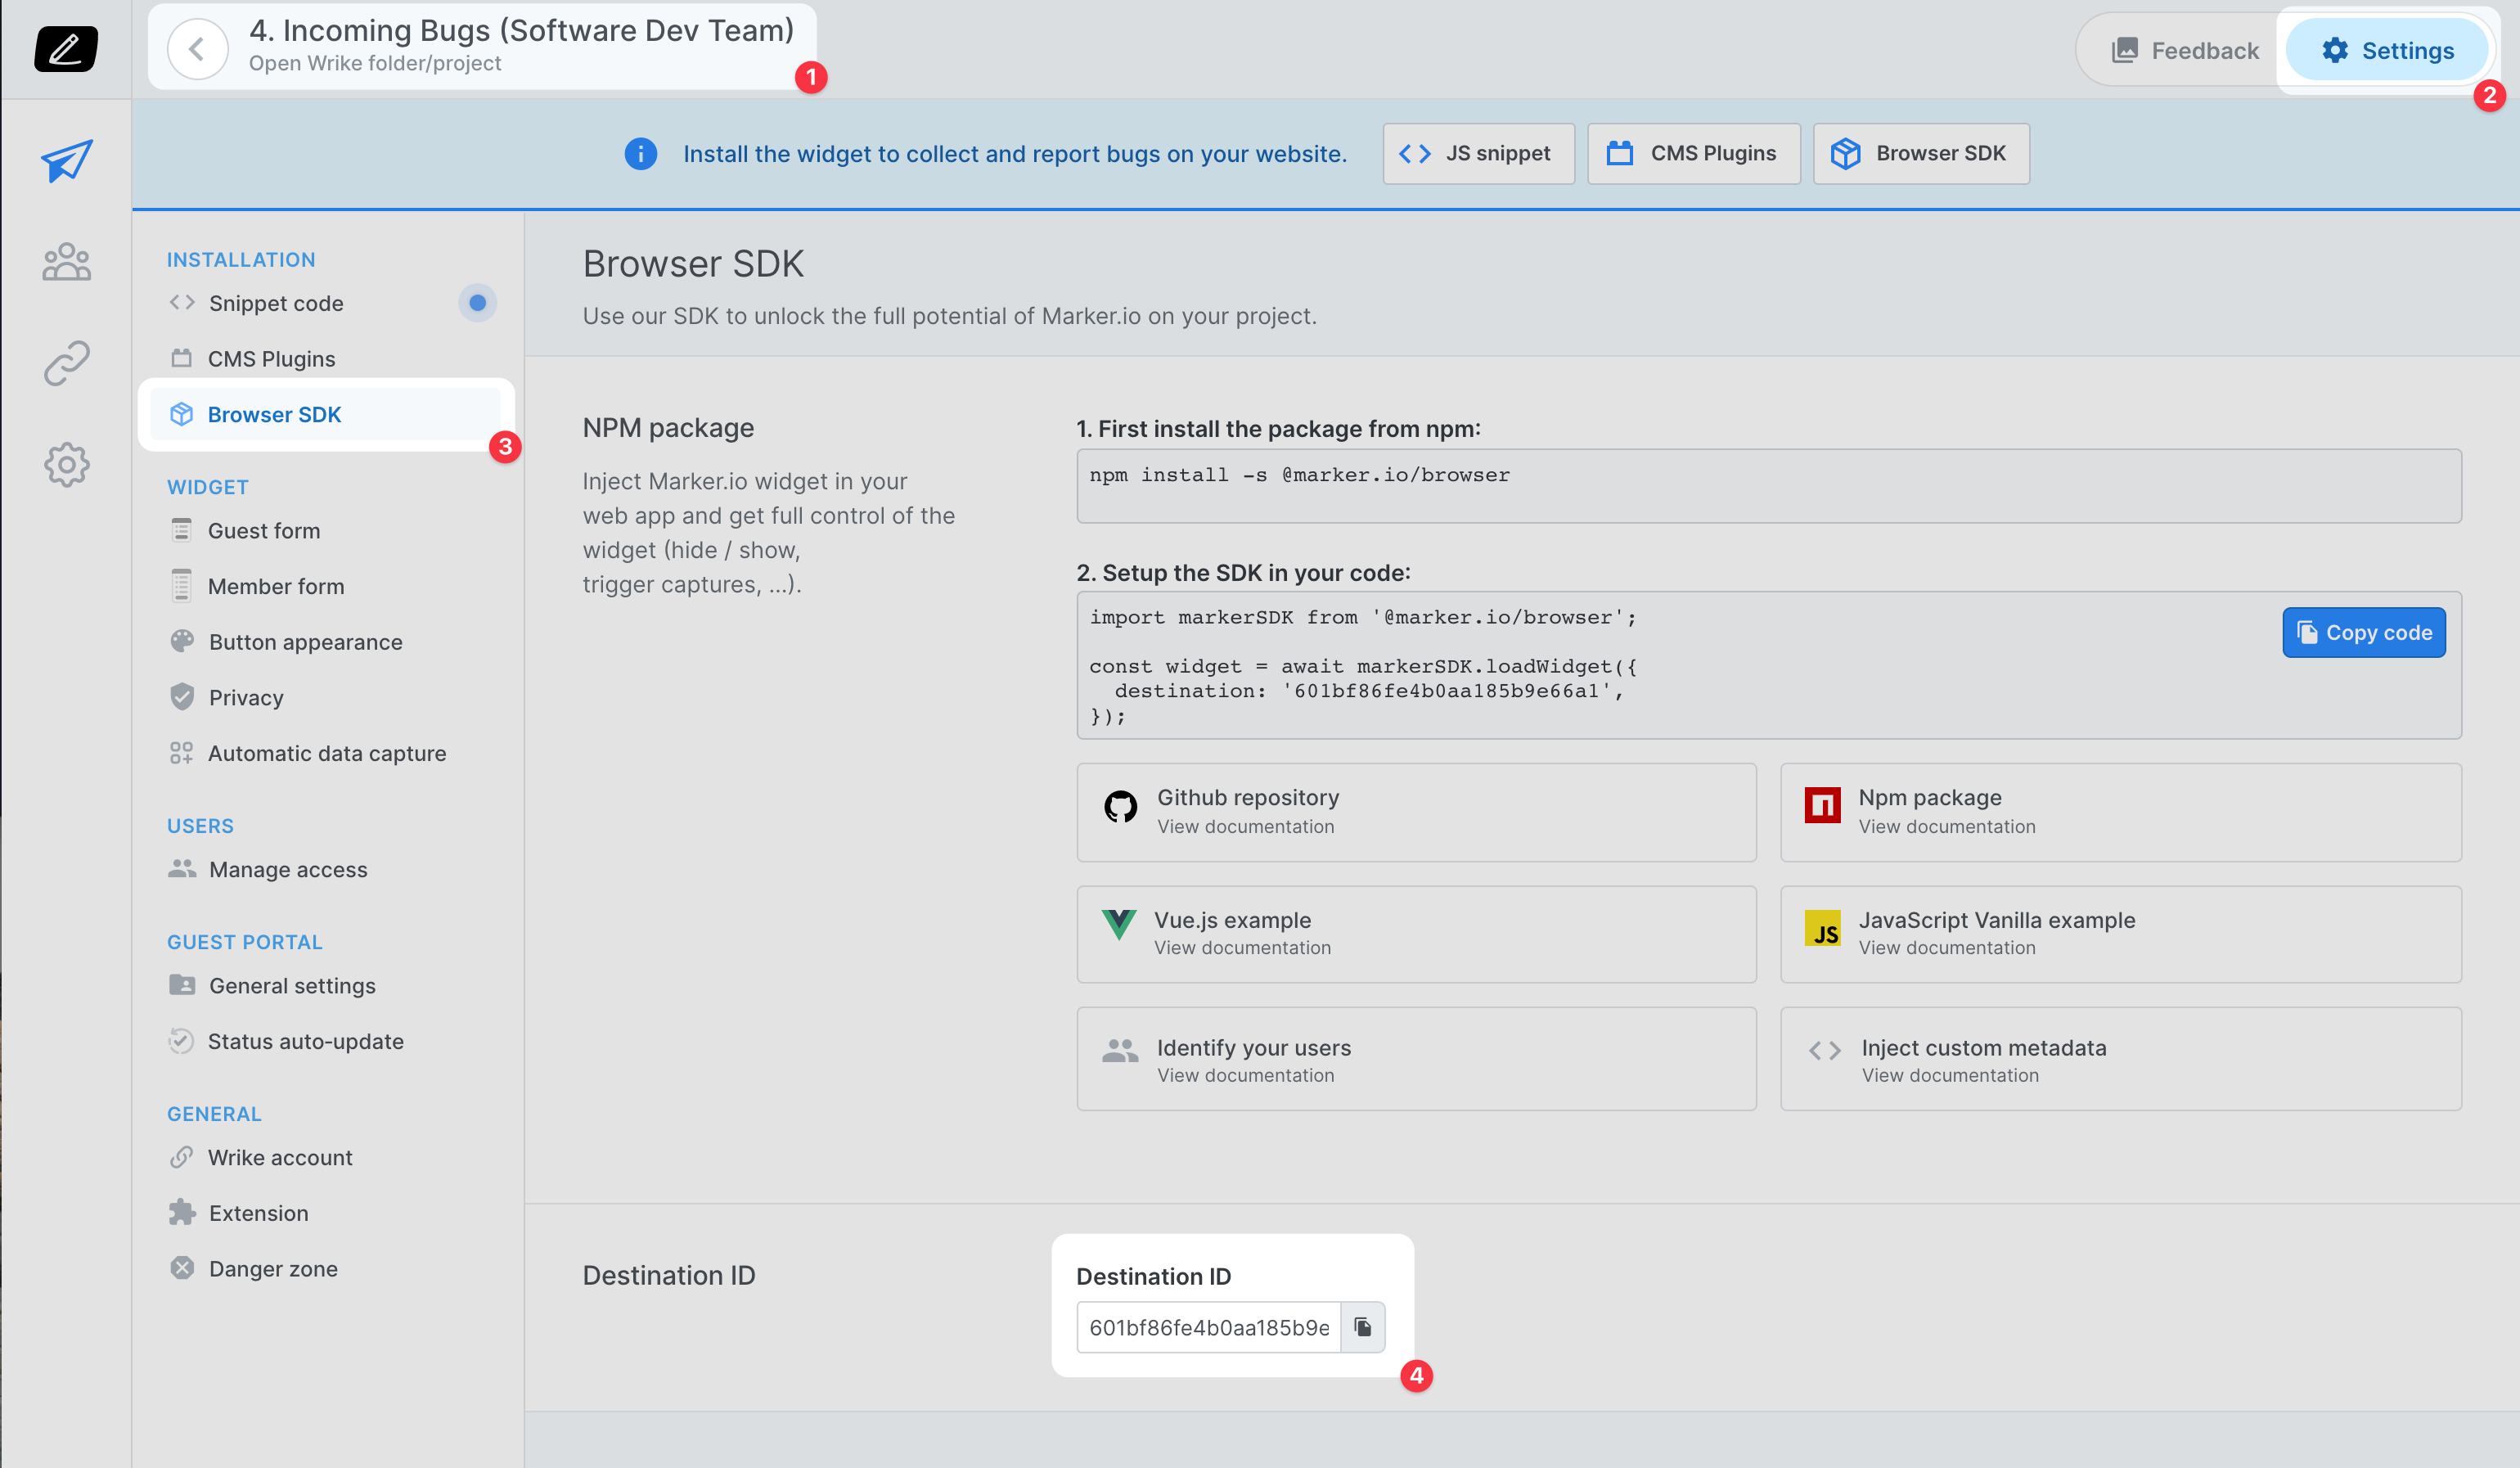
What is my project id, and how do I get it?
Every Marker.io project has a unique identifier that allows you to connect it with its widget. To get your project ID, first open your dashboard https://app.marker.io, then:
- Navigate to the project you want to collect feedback in
- Choose "Settings"
- Choose Browser SDK
- Copy your project ID
If you have correctly followed the steps above, the Marker.io feedback button will appear in the page!
Here's how a regular Marker.io button looks like:
.png)
Custom button: Integrate a custom feedback button for a seamless user experience
While the default Marker.io feedback button requires no effort to work, with some development skills you can now build your own in a matter of minutes!
The first step is to choose to hide the button in your project settings, to do so:
- Open your project settings
- Navigate to the "Button appearance" section
- Choose "Hide widget button"
.png)
Now you can see that when your application loads, the feedback button is not showing up any more. That's what we need, perfect!
The next step is to implement our custom button. For example, at Marker.io, we chose to place a special option in our Help center popover to trigger our widget.
.png)
This is more or less how it looks in our HTML:
Let's add a few lines in our JavaScript code to make it work...
It's that easy!
Now you have your widget integrated natively
Adding Metadata: "Can I add more context?" 🕵️
There are situations where adding extra information inside your issues can help developers a lot. The Browser SDK fully supports custom metadata, so adding additional information to issues is really dead-simple.
Let's see how it works:
Let's say your site is a marketplace and the user is on a product item page, we can add this information to the issue with a few lines of JavaScript:
Now, when your users report a bug, Marker.io will inject this metadata directly inside your issue so that your developer doesn't need to look after that information, it's just there!
Here's an example in Jira:
.png)
You can read more on GitHub.
Reporter identification: "I don't want to ask my reporters to login…"
Whenever a reporter submits an issue, Marker.io will ask them for their email address in order tto notify them when issues get resolved, or when comments are posted.
But, because we've been building our web-app, and we know our user's identity, we can feed that information through the SDK so that we can skip this step by adding a few lines of code:
Regardless of the method you use, Marker.io will add your reporter's information inside your issues automatically. Smooth.
.png)
Wrapping it up
In this article, we've been covering how easy it is to load and customize your widget via the SDK, we've demonstrated how we can inject application data, and we identified our reporters programmatically.
All our developer documentation is available on GitHub, also we've built some examples here.
We would love to hear your feedback on this, please do not hesitate to reach out to us inside Marker.io, or to file a GitHub issue if you spot any bug!
There's more to come in the SDK:
- Customizing appearance (colors, labels, ...)
- Recording user actions and custom events
- .. and more!
What should I do now?
Here are three ways you can continue your journey towards delivering bug-free websites:
Check out Marker.io and its features in action.
Read Next-Gen QA: How Companies Can Save Up To $125,000 A Year by adopting better bug reporting and resolution practices (no e-mail required).
Follow us on LinkedIn, YouTube, and X (Twitter) for bite-sized insights on all things QA testing, software development, bug resolution, and more.


Get started now
Free 15-day trial • No credit card required • Cancel anytime