How to Write Test Cases in Jira
Improve your QA process with our step-by-step guide on how to write test cases in Jira.


When you’re building complex web applications, QA testing can turn into a nightmare.
There are so many flows and components to test — login flows, sign-up flow, payment flow, invite flow... and a million more.
That’s why test cases are a QA testers’ secret weapon to align your team and make sure everything works as expected.
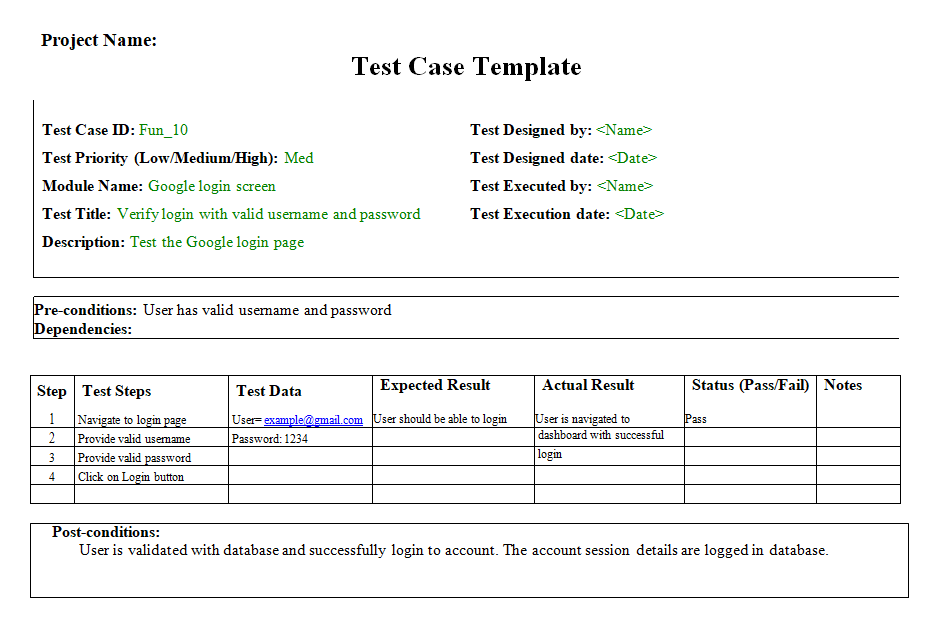
A good practice is to create a template for each test case.
Here is an example of a test case for a Google login flow created in a spreadsheet:
But using a spreadsheet is just not scalable, especially when your entire team runs on Jira.
The problem with Jira is that at its core, it’s “just” a bug & issue tracking tool. It wasn’t built for case testing, and trying to find a workaround for it is a massive pain.
But we have a solution for you!
In this post, we’ll show you:
- How to setup Jira for case testing;
- How to write test cases in Jira using custom issue types;
- How to run your test cases when testing your applications.
Let’s dive right in.
1. Set up Jira for case testing
Since Jira does not have a test case feature built-in, we will use the issue type feature as a workaround.
Jira’s customization options are endless. All you need to do is create a new custom issue type specifically configured for case testing.
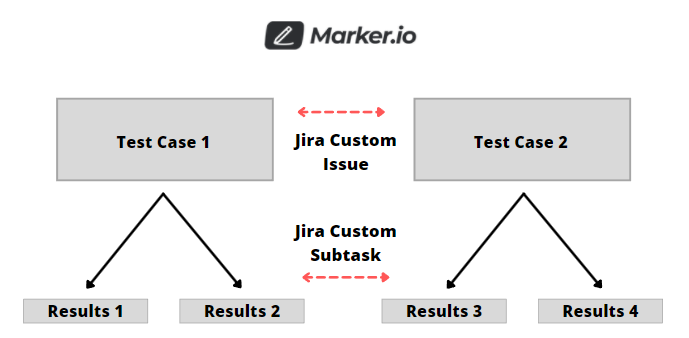
You’ll also need to set up custom subtasks — so reporters can submit results of test cases straight in Jira, too.
Here’s a visual representation of what we’re trying to put together:
For test cases, we recommend creating a “Test Case” issue type with at least the following fields:
- Summary
- Test Case Steps
- Test Case Expected Results
Creating a custom issue in Jira is a simple, 9-steps process:
- Inside Jira go to global Settings > Issues (you’ll need admin access for this).
- Click Add Issue Type and create a new issue type (eg: Test Case).
- Go to Issue type schemes settings, find your Jira classic project and click Edit.
- Drag your new Issue type into your project’s current scheme.
- Next, go to Screen settings > Add Screen.
- Pick the fields you want in this Issue type, (e.g. Summary, Test Case Steps, Test Case Expected Results). Keep it simple.
- Go to Screen Schemes > Add Screen Scheme, create a new Screen scheme (e.g. Test Case screen scheme). Link it to your custom Screen (e.g. Test Case Screen).
- Go to Issue type screen schemes. Find the Jira Classic project you are looking to use your new Issue type with. Then, click Associate an issue type with a screen scheme, select your new issue type (e.g. Test Case) and its Screen scheme, then click Add.
- Congratulations! You created a new custom Jira issue type with only selected fields, scoped to a specific Jira project.
Now, let’s set up a custom “Test Case Results” subtask where testers will fill in their reports.

Here’s how you create a custom subtask in Jira:
- In the Jira admin go to Issues > Add Issue Type. This time pick Sub-Task Issue Type.
- Then, go to Screens > Add Screen. Pick the fields for our Test Case Results subtask.
- Head over to Screen schemes > Add Screen Scheme, create a new scheme and pick Test Case Screen as default.
- In Issue type screen schemes, do not create a new screen scheme. Find the test case screen scheme we set up earlier. Then, click Configure under Actions, and Associate an issue type with a screen scheme.
If you’re new to Jira, all of this might be a little overwhelming.
We’ve got your back — check out our step-by-step guide on how to create custom issue types in Jira.
2. Create test cases in Jira
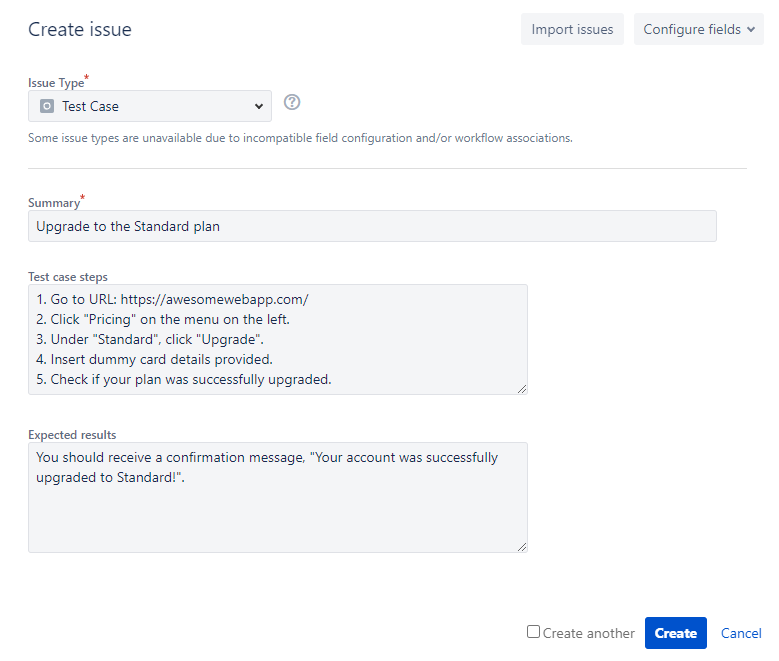
Once your project is properly set up, creating test cases is the same as opening a new issue.
Head over to your Jira project, click “Create”, pick the “Test Case” issue type you’ve just created, and start writing.
A good practice is to create one issue per test case.
Good test case instructions should include:
1) Detailed steps. What steps you’d like your tester/reviewer/end-user to take as they navigate through your site or web app.
2) Expected results. Even if your reviewer says everything went well — you want to make sure they landed on the proper page or experienced your app how you wanted to.
It really is this easy:
3. Report on test cases in Jira
On the other side of the equation — the reporter — the process is just as simple.
You’ve got two choices here:
- The old school, manual route. Write your reports directly in Jira. Include screenshots, screen recordings, annotations, environment info, and anything else the developer needs.
- Report from a third-party app. Streamline as much of the process as possible, and capture the “boring” stuff automatically.
Option 1: Manual reporting
Find the test case, hit “Create subtask”, and choose “Test Case Results”:
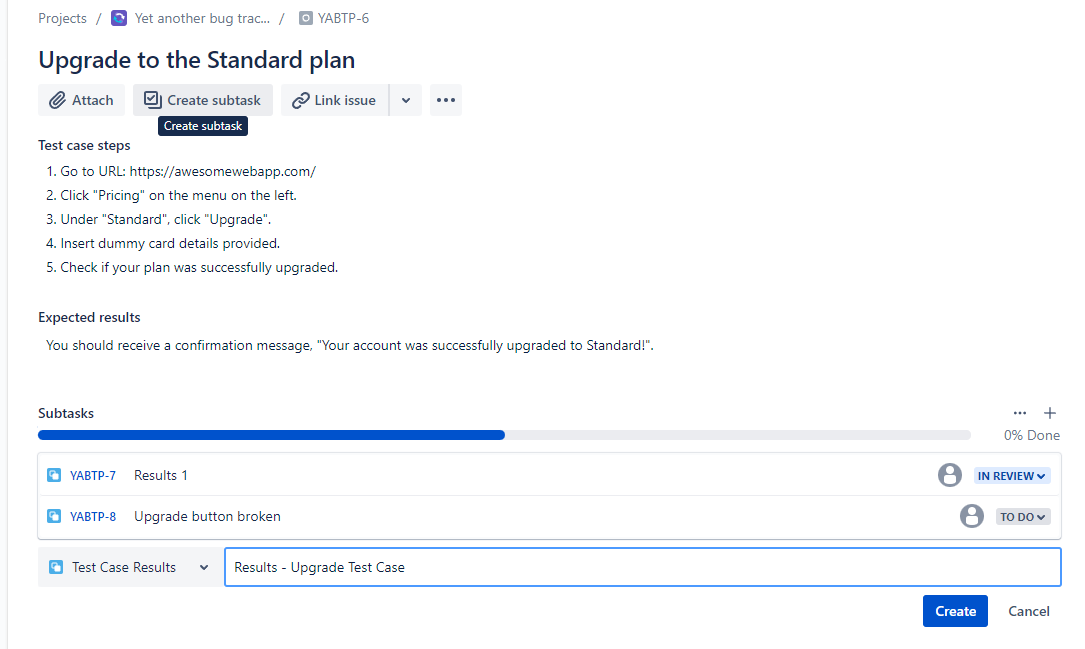
Every subtask you create this way will be linked to the main task, A.K.A. test case. This makes it very easy for the developer to trace back to the main issue.
Remember to include screenshots, as well as any relevant technical information. This will make it easy for anyone to reproduce any bugs you find during testing.
This process, unfortunately, is still very slow.
- You have to switch back and forth between your app and Jira.
- You have to manually record technical environment like URL, OS, console logs.
- You have to use a third-party screenshot tool to capture and annotate your screenshots.
Just look at how many steps you have to take to report just one bug:
- Find the bug.
- Open screenshot tool, capture bug.
- Open software to annotate screenshots and add comments.
- Log into Jira.
- Create a new issue.
- Document the bug.
- Add technical information.
- Attach screenshot.
- ...do we really need to go on?
Jira simply wasn’t built for this.
But don’t worry: there is a better way.
Option 2: Third-party app reporting
Our recommendation: use a bug reporting tool that seamlessly integrates with Jira — and use it for case testing.
This brings us to our next option.
How many times have you had to double check on a test case to figure out:
- Environment information;
- Console logs;
- Steps taken by reporter;
- ...and more?
Every time your developer needs to get in touch with the reporter for “clarification”, you waste valuable time.
That’s why we built Marker.io.
With the Jira configuration detailed above, reporting on test cases with our tool turns into a simple 3-steps process:
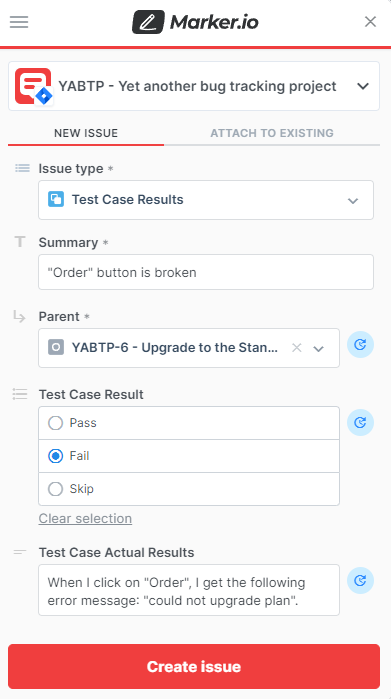
- Go to the URL that needs to be tested and click on “Report a bug”.
- Input details of your report.
- Click on “Create issue” — done!

When we zoom-in on the widget form, you will find our “Test Case” issue type that we created earlier.
This works thanks to Marker.io’s 2-way synchronization with Jira.
And on the developer end, in Jira:
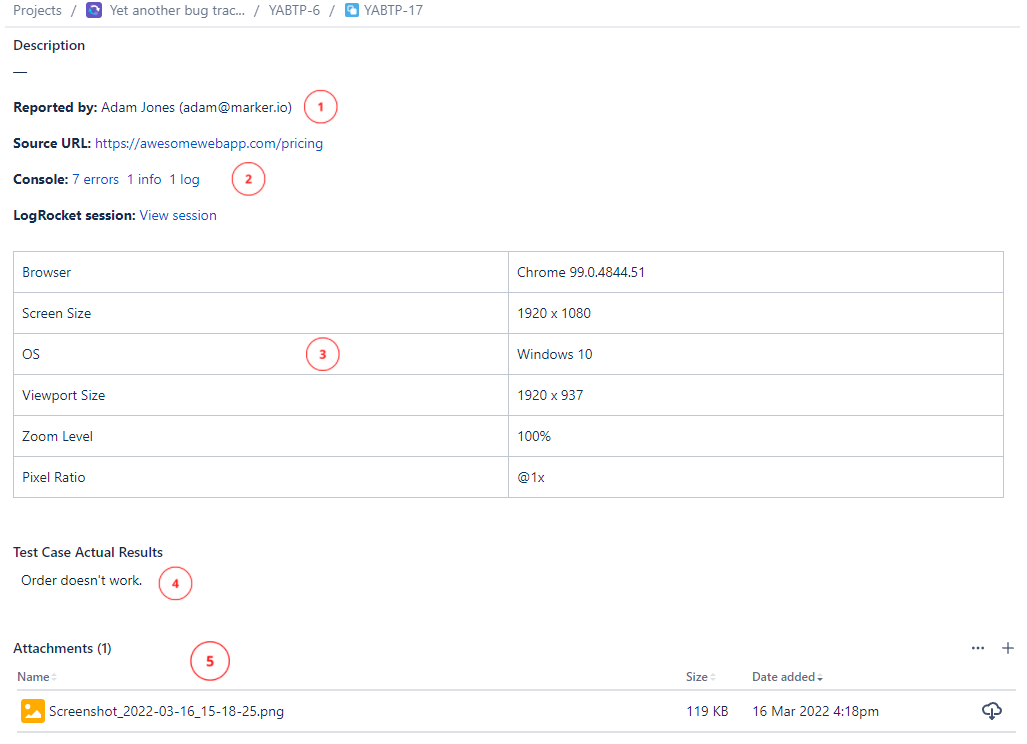
1 - Reporter name
2 - Technical info (URL, console logs...)
3 - Environment
4 - Test case results
5 - Screenshot attachment
All in one place.
Are you ready to take your case testing & bug reporting in Jira to the next level?
Check out how Marker.io integrates seamlessly with Jira.
Wrapping up...
So there you have it: our step-by-step guide on how to write test cases in Jira.
As a reminder, a good test case report should:
- Be comprehensive: attach screenshots, annotations & comments;
- Capture as much info as possible: use third-party tools or include recording & environment info in report;
- Be traceable: ensure every test case is directly linked to an issue.
We hope this post helps you organize and run test cases efficiently for your next project!
What should I do now?
Here are three ways you can continue your journey towards delivering bug-free websites:
Check out Marker.io and its features in action.
Read Next-Gen QA: How Companies Can Save Up To $125,000 A Year by adopting better bug reporting and resolution practices (no e-mail required).
Follow us on LinkedIn, YouTube, and X (Twitter) for bite-sized insights on all things QA testing, software development, bug resolution, and more.
Nathan Vander Heyden
Nathan is Head of Marketing at Marker.io. He used to work as a SEO consultant for various SaaS companies—today, he's all about helping Web Ops teams find more efficient ways to deliver bug-free websites.
Related blog posts


Get started now
Free 15-day trial • No credit card required • Cancel anytime